TAXIWAYPARKING AND JETWAYS
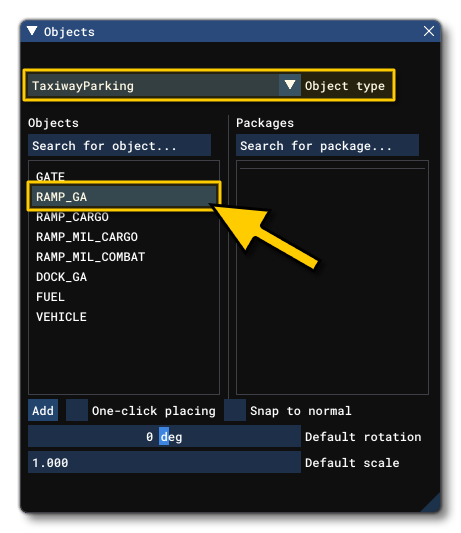
With our taxiways added, we need to add in some parking spots for the aircraft now. For this we'll use the TaxiwayParking object, and we'll be using the RAMP_GA type to start with:
Place one of these in the scene right now beside the middle taxiway path:
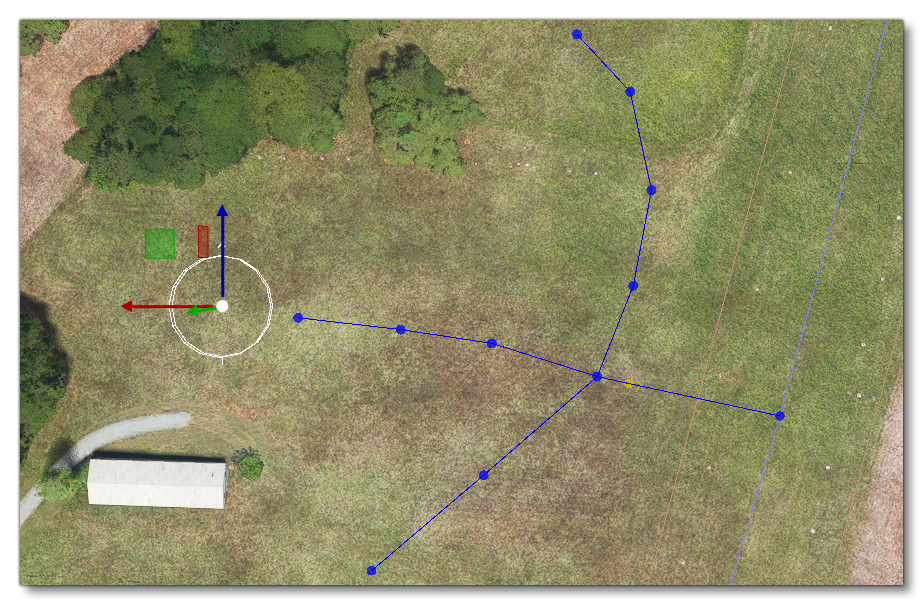
Connecting The Parking
The first thing we need to do is connect the parking object to the taxiway. For that you need to click on the parking object to select it, then hold Ctrl and click on the last point of the taxiway path that you want to attach it to. We then right click and select Create Path:
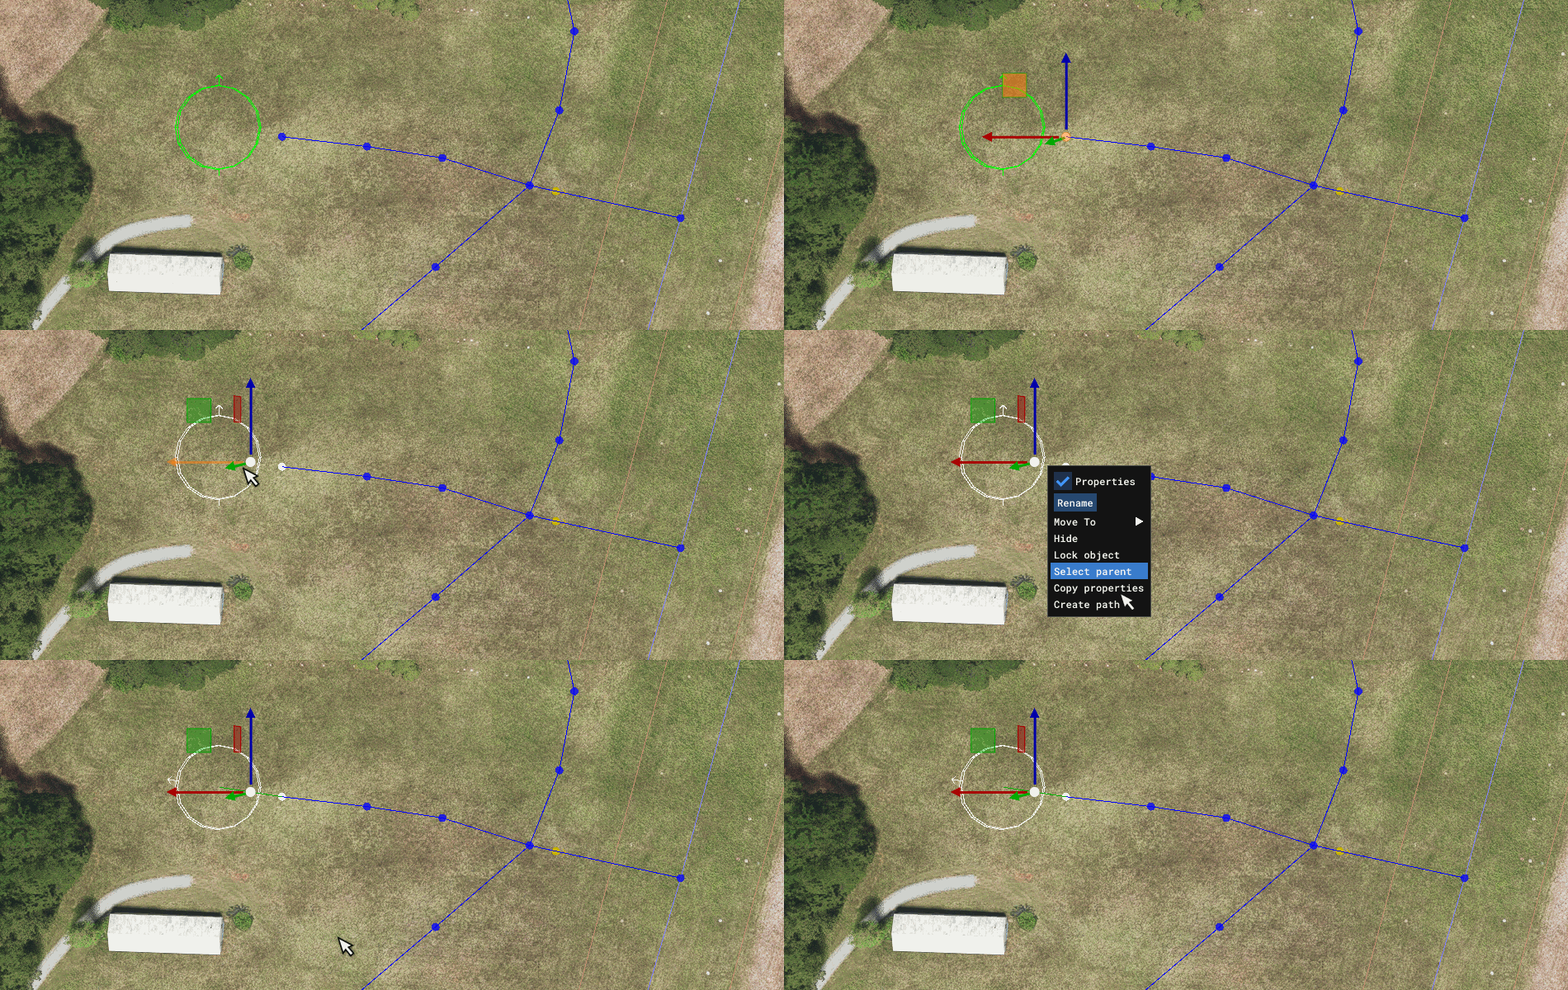
When it has been connected, there will be a new TaxiwayPath object of the type Parking (it will be coloured dark green so you can visually check that it's correct). The parking spot orientation will also change to match the direction of travel along the taxiway path, which you can see by the direction of the arrow coming from the parking spot.
Setting Up The Parking
The parking space has been connected and oriented correctly, which means you can now set up it's size and other properties. For this you want to first go to The Scenery Editor and in the Rendering menu select the option Show Parking Spaces. This will show the area around the parking space that will be reserved for additional airport vehicles using a dashed line:
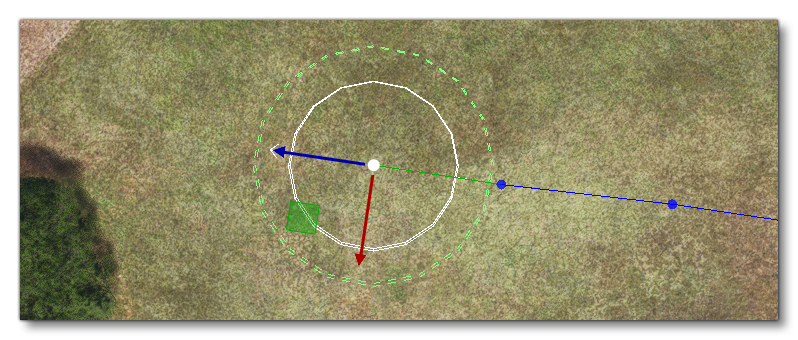
With that done, you can then set the size of the parking space. You can do this precisely using the Radius parameter in the properties window, or alternatively, you can use the Gizmo - set to Scale - and visually adjust the size of the parking space. For our tutorial we want the radius to be around 20m:

Once the size is set, you also need to give the parking spot a number. Each parking spot must have a unique designation number, and in this case we'll set it to 1.
Further Parking Spots
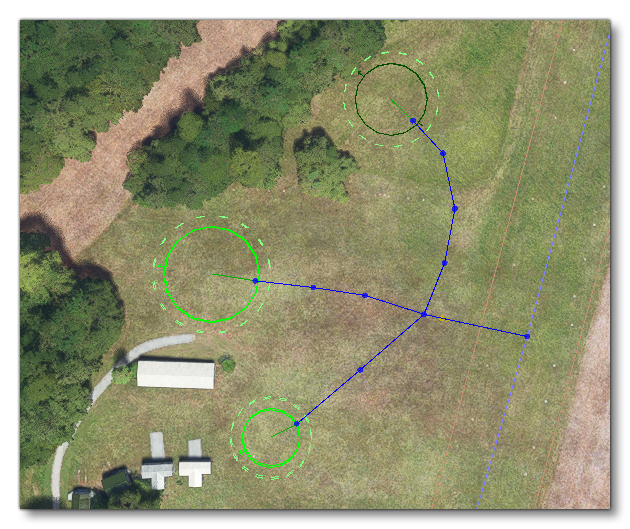
You can now go ahead and add two more parking spots, following the same procedures outlined above, one for each of the connecting taxiway paths. These parking spots should have a smaller radius of about 15m. When you've finished doing that we want to set the top parking spot to be of the type Fuel, so that it can be used for refueling aircraft. When finished, the scene should look like this:
Adding A Jetway
The airport we are editing is pretty much finished at this point, but for the sake of the tutorial, we're going to continue to keep adding elements to demonstrate how each of them is created and works in the scene. We'll start with adding in a jetway - which is obviously not appropriate at all for this airport, and when you are creating your own airports, you should avoid "improvising" like this.
NOTE: For this part, you might prefer to set the camera to the Developer Camera rather than the Top Down Camera, as it makes working with 3D objects easier.
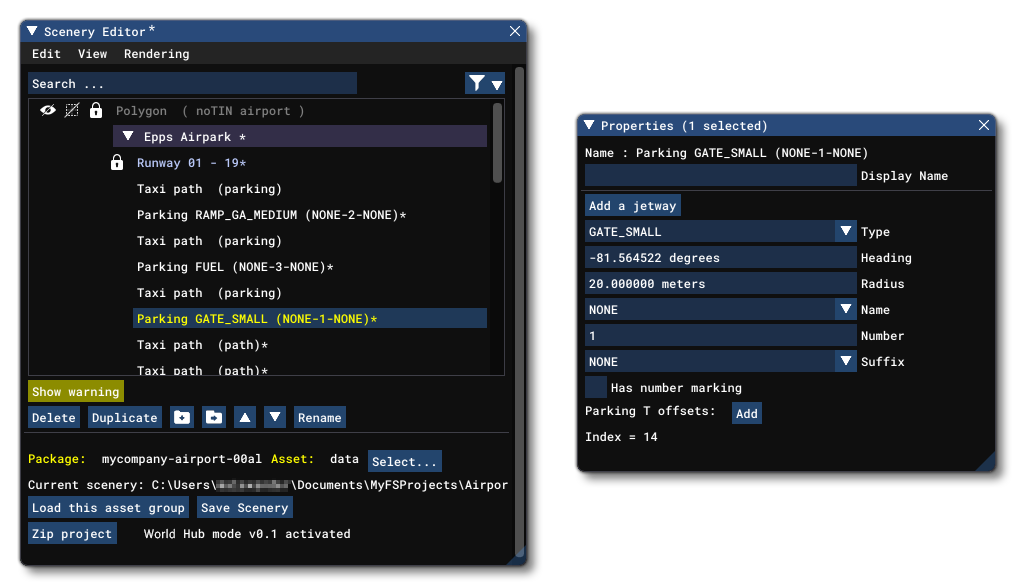
We'll add the jetway to the larger parking spot that we made, and so you will need to change the type of the TaxiwayParking object to be Gate Small or Gate_Medium. This will trigger a warning in the Scenery Editor, as these gate types require a Jetway which we haven't added yet, and you'll also have an extra option to add the jetway in the object properties:
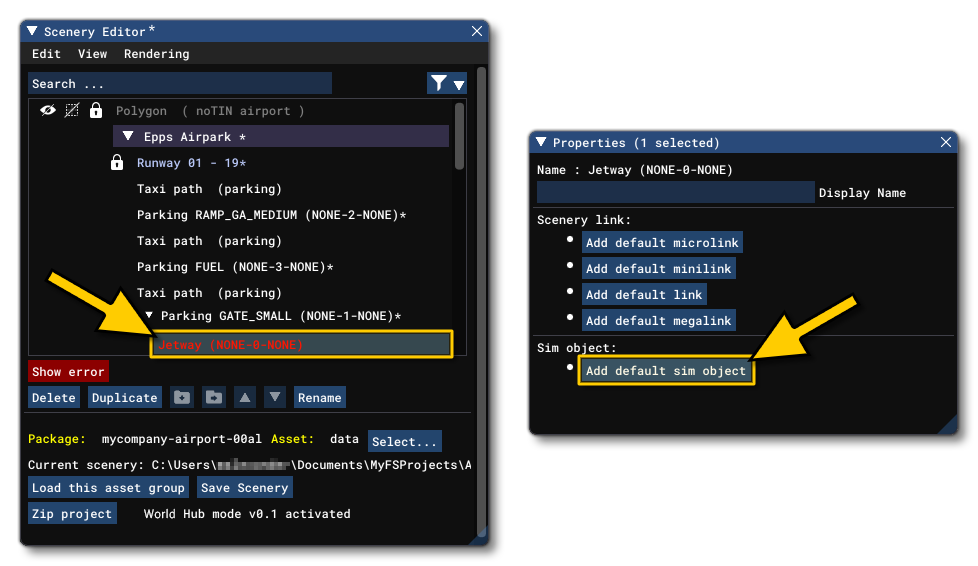
You should now click the Add A Jetway button, which will add a Jetway Object to the parking spot. Note that this does NOT add the jetway itself, as that requires a SimObject, it only adds the Jetway object which is essentially a container for the jetway SimObject components. To add the jetway SimObject, you need to select the Jetway Object in the Scenery Editor and then in the properties click on the Add Default Sim Object button:
This will add the a JetWay SimObject to the parking space, which can then be rotated and positioned as required using the Gizmo tool:
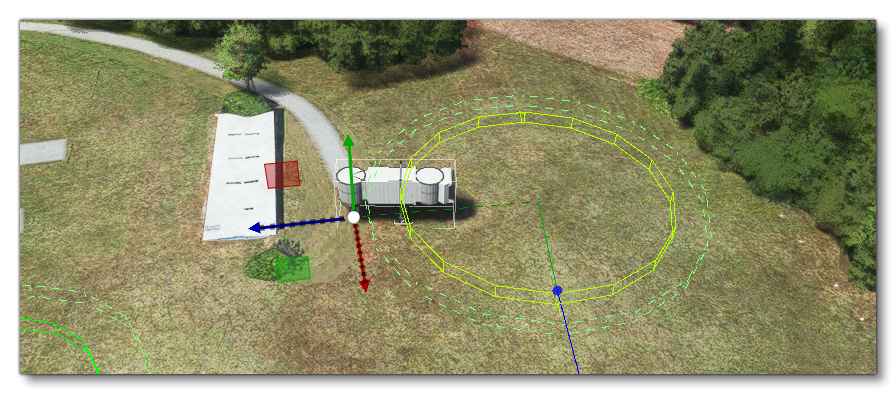
You can also add a Jetway Link scenery object to link the jetway to any buildings using the Jetway container buttons, and edit the position and placement using the Gizmo tool, as shown in the image below:

Obviously in this example it's not very realistic, but for the sake of this tutorial we'll leave this parking spot as it is.