TAXIWAY PARKING OBJECTS
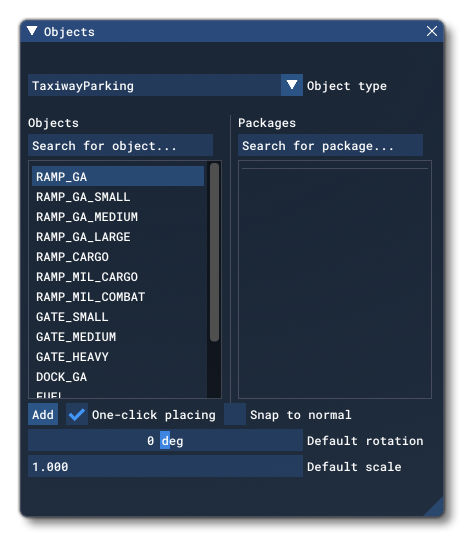
A Taxiway Parking object is an object element that is used to add an aircraft or ground vehicle parking area to an airport in the world. When you select this object type you will be presented with a list of different object elements listed in the Objects window:
When you click the Add button, the Taxiway Parking object will be added to the scene and can be positioned using the Gizmo. Once positioned, the taxiway parking can be edited.
IMPORTANT! Taxiway Parking objects require one or more Airport Objects to be present in the scene, and must be added to an airport group in The Scenery Editor. If no airport is present then they cannot be used. Also note that if they are placed too far away (ie: outside the airport Object Test Radius) then they will not be rendered.
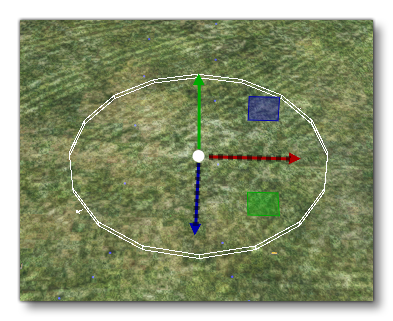 When placed in the world, it will be displayed as a circular area, and you can use the Gizmo to not only place the parking spot, but to rotate it - you can see a small arrow indicating the orientation - as well as change the scale of the object. When the parking spot is for aircraft, the scale will affect the size of the aircraft that can use the parking spot.
Connecting A Taxiway Path
Once you have placed the taxiway parking spot in the world, it will generally need to be connected to TaxiwayPoint Objects using TaxiwayPath Objects. To do this you must first select the taxiway parking object in the world, then use Ctrl and left mouse button to select the taxiway point that you want it to connect to. You can then do one of the following things to add a path between the two:
- Select the Taxiway Path Object in the Objects window and click
Add. - Use the Right Mouse Button and select the Create Path option.
This will then add a Taxiway Path object between the point and the parking, which will look like this in the world:
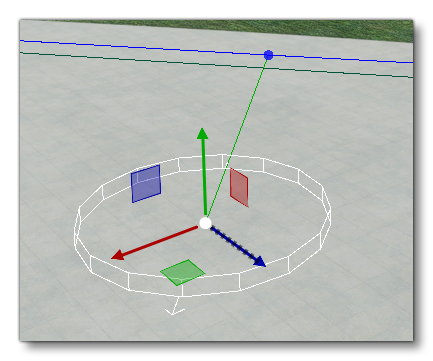
NOTE: Taxiway Paths added to link Parking Spots with Taxiway Points will not have a surface texture and should be placed over Apron Objects if you require a texture.When you connect the point to the parking, the parking spot heading will be rotated to be parallel to the path. Also note that you can connect more than one Taxiway Path point to a Parking spot if required (although you wouldn't normally), and you can remove the path by selecting it and using the Delete key on the keyboard.
Jetways
Depending on the Type of parking that you add, you may get an error shown in The Scenery Editor telling you that you need to add a Jetway:
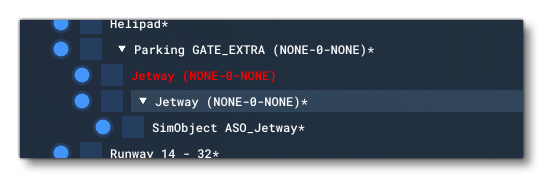 Specifically, this error will occur when you have set the parking as being any of the GATE_ types. Gates require a jetway to connect any parked aircraft with the airport terminal, and as such you will need to add a Jetway to this kind of parking spot.
Properties
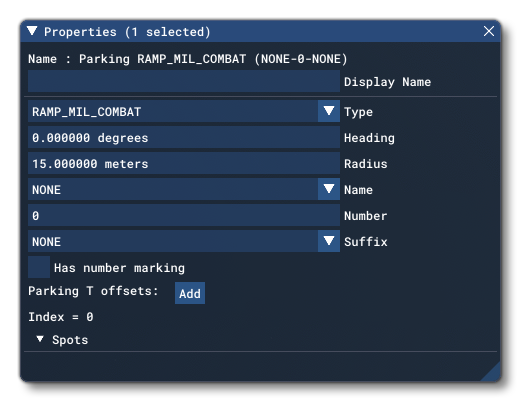
The Properties window for a Taxiway Parking looks like this:
-
Name
This is the name of the element as defined by its object type properties.
-
Display Name
This is the name of the element as it will be displayed in the The Scenery Contents List. This can be edited and is helpful for identifying elements when you have a lot of items in the content list.
-
Type
This can be used to change the type of taxiway point that is being edited. You can choose one of the following types, which will be drawn with the corresponding colour in the scene:-
NONE
-
DOCK_GA (green)
-
FUEL (dark green)
-
GATE_HEAVY (yellow)
-
GATE_MEDIUM (yellow)
-
GATE_SMALL (yellow)
-
RAMP_CARGO (green)
-
RAMP_GA (green)
-
RAMP_GA_LARGE (green)
-
RAMP_GA_MEDIUM (green)
-
RAMP_GA_SMALL (green)
-
RAMP_MIL_CARGO (green)
-
RAMP_MIL_COMBAT (green)
-
VEHICLE (dark blue)
-
RAMP_GA_EXTRA (green)
-
GATE_EXTRA (yellow)
Note that when the FUEL type is selected, there will be an additional option:- Has 3d Mesh: This checkbox is so you can decide if you want the parking space to generate a fuel mesh or not.
-
-
Heading
The parking spot heading (oriented from the North) from -360.0° to 360.0°. This is shown in the world by a little arrow on the edge of the bounding circle. Note that this can be edited using the Rotation Gizmo.
-
Radius
The parking spot radius, in meters. This will determine the size and type of aircraft that can park there (where applicable). Note that this can be edited using the Scale Gizmo.
-
Name
The parking spot name. Can be any one of the following values:- NONE
- PARKING
- N_PARKING
- NE_PARKING
- E_PARKING
- SE_PARKING
- S_PARKING
- SW_PARKING
- W_PARKING
- NW_PARKING
- GATE
- DOCK
- GATE_A - GATE_Z
-
Number
Defines the number of the taxiway parking (goes with the given name), from 0 to 3999.
-
Suffix
Here you can select the suffix to be added to the taxiway parking name and number. Either NONE or a value between GATE_A and GATE_Z.
-
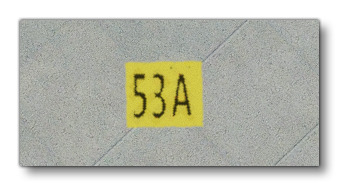
Number Marking
When enabled, this will display number markings for the taxiway parking spot, as shown in the image below:
This will also enable additional options that can be edited to position the number if required:
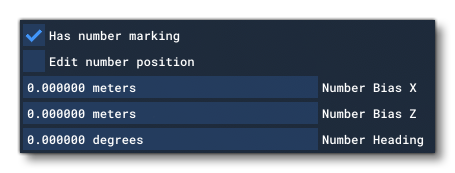 Checking the Edit Number Position will permit you to edit the following properties:
-
Number Bias X
This is for offsetting the position of the parking spot number along the X axis. Values are in meters. -
Number Bias Z
This is for offsetting the position of the parking spot number along the Z axis. Values are in meters. -
Number Heading
This is for changing the angle that the parking spot number is orientated, in degrees.
-
-
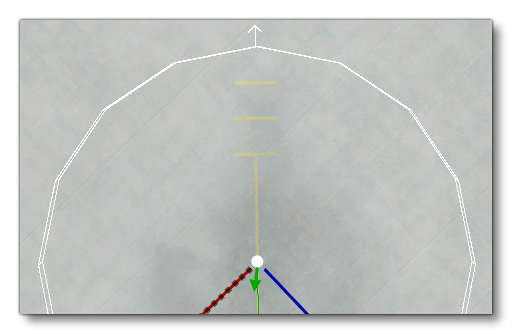
Parking T Offsets
This option permits you to change the "T" position - or add more "T" positions - to the parking spot. These are approximately where the nose wheel for an aircraft should sit when parked, and you may want to have various of them if the parking can accept multiple different sizes or types of aircraft. If you click theAddbutton you will be shown a new input field where you can set the offset, which is in meters and calculated from the center point of the parking spot. You can add up to 4 different values, and the last one will always be connected to the center spot and the taxiway path. The image below shows a parking spot with 3 different T Offsets:
 You can remove the last T offset value added using the
 Removebutton, and repeatedly pressing it will remove the offsets in sequence.
NOTE: This is a purely visual effect and will have no influence on where an aircraft using the spot will actually park.
-
Index
This is the identifier index assigned to this taxiway parking inside of an airport.