SIMOBJECT OBJECTS
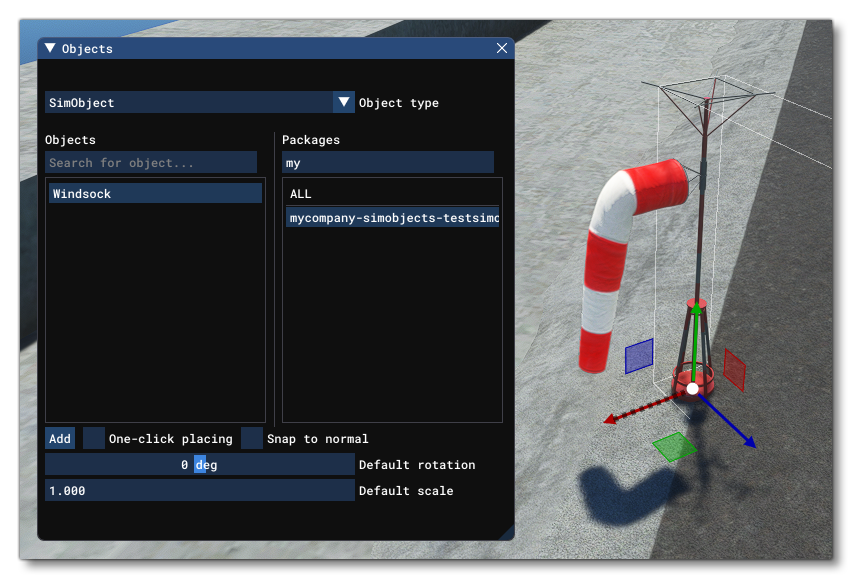
A SimObject object is an object element that participates in the physics/world simulation and can belong to an airport or be placed as a scenery element outside an airport. They can also be used in SimProp Containers. For example, ground vehicles, marshallers, animals, etc... are all SimObjects.
When you select this object type you will be presented with a list of different SimObject object elements listed in the Objects window:
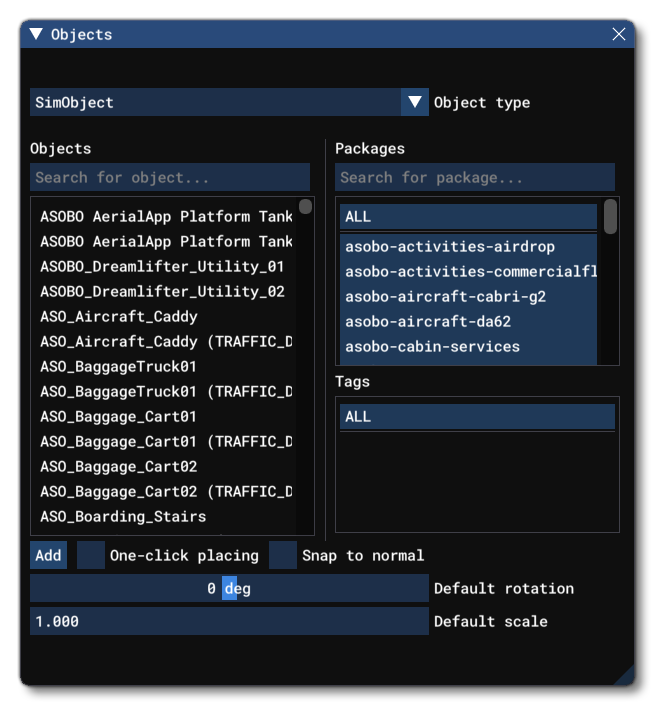
The exact number and kind of elements listed will depend on the version of Microsoft Flight Simulator 2024 that you are running as well as what packages you have installed and whether you have added any custom SimObject assets or packages.
To place a SimObject object element in the scene you can click the Add button, and then use the Translate Gizmo to position the object where you want, or you can enable One-Click Placing and simply click in the world to place it. You may also use the Rotation Gizmo to change the angle the element is shown at, as well as the Scale Gizmo to change its size.
Properties
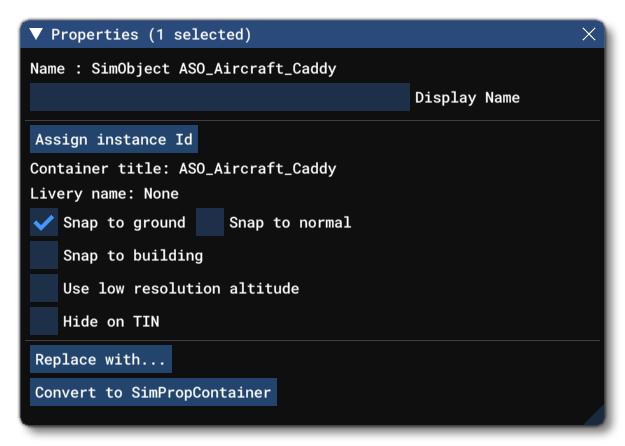
SimObject objects have the following Properties which can be edited:
-
Name
This is the name of the element as defined from its file.
-
Display Name
This is the name of the element as it will be displayed in the The Scenery Contents List. This can be edited and is helpful for identifying elements when you have a lot of items in the content list.
-
Assign Instance ID
Clicking this button will create a GUID-formatted Instance ID unique to the instance of the object element placed within the simulation. This can be useful for many things like when creating mission scripts (for example).
-
Container Title
This shows the name of the SimObject "container" group as it will be shown in The Scenery Contents List.
-
Livery Name
This shows the name of the livery that the SimObject is currently using.
-
Snap To Ground
This option is enabled by default, and will "snap" the object element to the ground so that - regardless of the terrain height - the element will always be at ground level, even when moving it. Enabling this means that the altitude Gizmo does nothing, while disabling this will permit you to change the altitude. When this is disabled, you will have a new option present in the Properties window:
-
Offset To Ground
This value is the altitude from the ground for the object, and editing it will raise or lower the element (and changing the altitude using the Translate Gizmo will also change this value automatically.
-
-
Snap To Normal
When enabled, the object element will change orientation based on the terrain surface normal underneath the center-point of the element. When disabled, it will maintain the default orientation regardless of the terrain underneath (or the orientation which is set using the Rotation Gizmo, and note that when enabled the Rotation Gizmo will only affect the horizontal axis around the center of the element). This option is disabled by default.
-
Snap To Building
When enabled, the scenery object element will snap to the height of any procedural building that is at the position where it has been placed. This option is disabled by default.
-
Use Low Resolution Altitude
This option, when checked, will force the simulation to use a lower resolution altitude calculation when calculating the placement of the object in relation to the camera. In general this option only needs to be checked when the object is placed on a slope and you can see it "bounce" up or down in altitude as the camera gets closer/farther from it. Enabling this option should stop this changing visual altitude.
-
Hide on TIN
When checked, this option will hide the object element unless the TIN data is unavailable, for example when the user is offline, at which point it will be visible. The option is disabled by default.
-
Replace With
The
Replace with...button permits you to select a different Scenery object / SimObject / SimPropContainer for the tower object element:
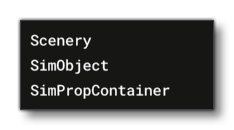 Depending on what you select from the window these options open, the properties for the object may change.
-
Convert To SimPropContainer
The
Convert To SimObjectContainerbutton permits you to convert the current Control Tower object into a SimPropContainer Object. Clicking this button will open a new sub-window with the following options:
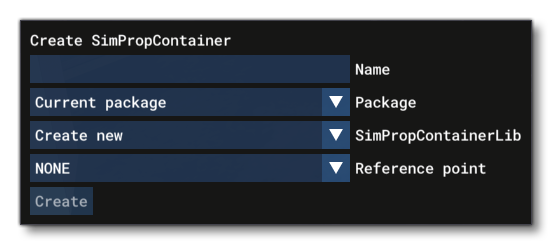
-
Name: The name that you want to give the new SimProp.
-
Package: The package that the SimProp will belong to.
-
SimPropContainerLib: The SimPropContainer library to add the SimProp to (a new one can be created here if none exist already).
-
Reference Point: If the object has reference points defined for it then they will be listed here and can be selected as the main "central" point to be used for placing the SimProp.
IMPORTANT! Creating a SimPropContainer in this way means that the object model becomes the pivot reference for the entire SimPropContainer. From this point on, if you edit the model and re-export, you should not change the pivot position in your modelling program otherwise you will be changing the entire SimPropContainer reference pivot.
-
SimProp Container Only Properties

If the SimObject is being added to a SimProp Container, the properties will show the following additional 3 options:
-
Only In Edition
When this is checked, the SimObject will only be visible when the the SimProp Container is being edited, but not when placed in the simulation.
-
Optimizable
Checking this option means that the decal object can be "optimized" - ie: the simulation will modify the spawn probability - based on the user graphics settings and platform:- Ultra: 100 %
- High: 50 %
- Medium: 25%
- Low: 12%
- xbox: 12%
-
Override AO Strength
When checked, this option will show a slider that permits you to override the automatic ambient occlusion settings. This can let you better match the lighting on the object with the rest of the scene.
Creating A SimObject
To create a SimObject that you can then use within the simulation (either as scenery or as an aircraft) or as part of a SimPropContainer Object, you will need to create a project and add a SimObject asset group to it. This section explains how to add a SimObject for use in scenery, however for aircraft, please see here:
You can find out how to create a new project from the following page:
Once you have the project in The Project Editor, you can select the package and in The Package Inspector scroll to the bottom and click the Add Asset Group button:

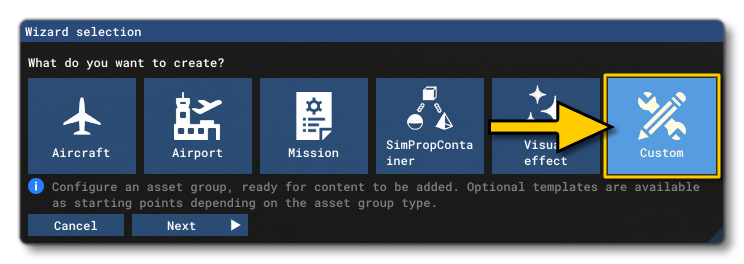
This will then open the Asset Group Wizard, where you should select the Custom button:
In the next window you will be asked to name your object, and give it an asset type, which should be SimObject:
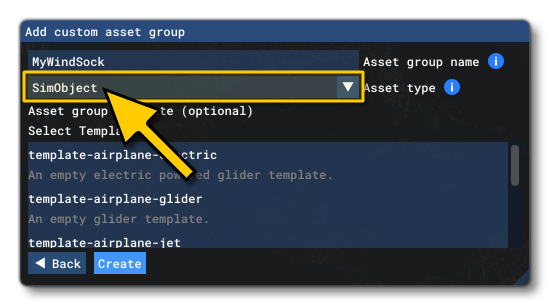
After clicking the Create button, the SimObj asset group will be added to your package. At this point you need to add the following folders and files to the main folder:
- the
*.glTF,*.bin,*.xmland*.cfgfiles to the model folder. - the different textures to the texture folder.
- the different animation files (
*.bin) to the animations folder. - the
sim.cfgfile.
These should all be placed within the PackageSources folder, within the folder for the SimObject. The actual folder where you place the files must be called Landmarks as that is the folder that the simulation will look for when generating SimObjects for use in scenery, for example:

Once you've added the required files, you should select the asset group in the Project Editor and then in the Inspector window ensure that the AssetDir and OutputDir paths are both correct. They should look something like this:
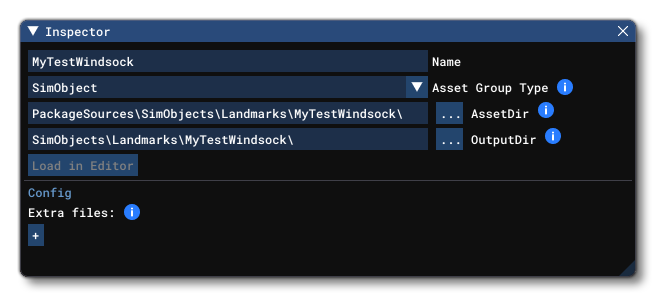
Once you've added the required files, you can then build the package and in the scenery editor you'll be able to select the object(s) to add into the scene:
