MODELING SIMPROP CONTAINERS
SimProp Containers are a combination static objects or SimObjects which are put together within SimProp Container Objects in The Scenery Editor. What this means is that instead of building an entire airport building (for example) as a single monolithic model, you instead model the parts of the building as individual models with their own LODs, and then put them together within the Scenery Editor to create a single SimPropContainer object.
Overview
In Microsoft Flight Simulator 2020, airport buildings were generally comprised of large meshes with a lot of details, and as such were often very expensive in terms of framerate and memory. Their large dimensions meant that many of the smaller elements were displayed at all times, regardless of the distance to the camera or the size on screen of those elements, and for very large buildings the LOD system didn't help much since the camera could be close to one part of the building but far from another - so a large number of polygons would be computed and some memory would be used for objects that are at the opposite end of the building, and either not visible or meaningless from the user point of view.
Another benefit of SimProp Container objects is that many sub-objects can be shared between SimProp Containers and general scenery by creating your own SimProp Libraries. Thanks to libraries, those objects that you use frequently do not need to be modeled multiple times and any improvements you make on those models will automatically propagate to the scenes that use them.
Creating The SimPropContainers
Let's look at an example SimProp Container, from KLAX (Los Angeles International) airport, which has a lot of elements to add detail:
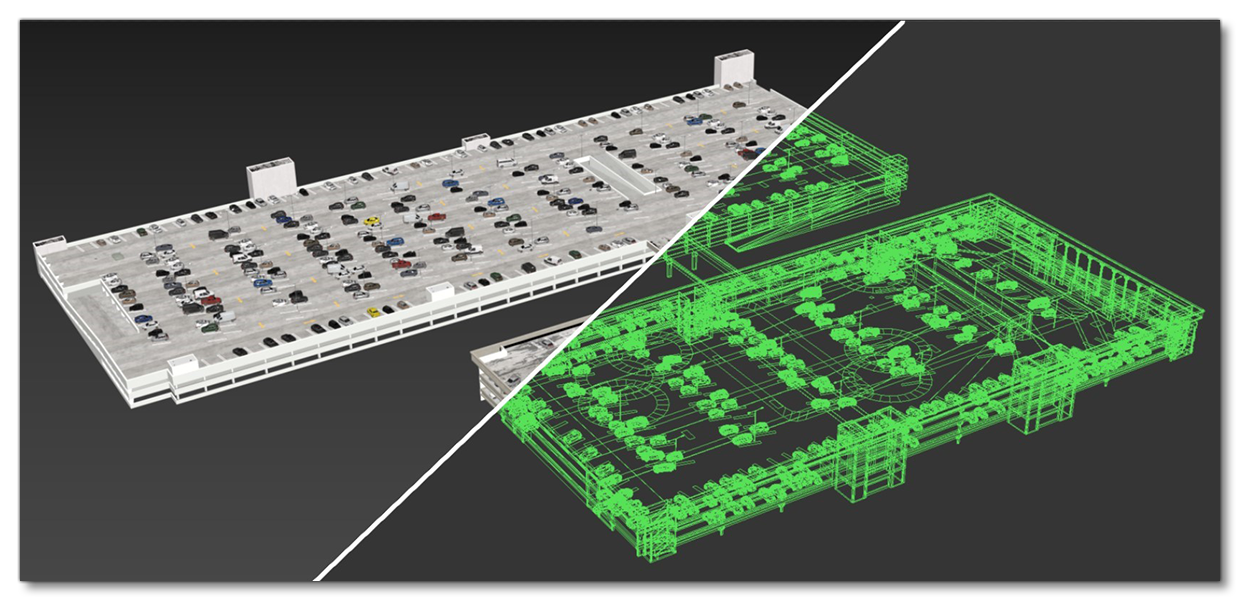
The object pictured above is comprised of approximately 300,000 polygons, 98 materials and 147 textures. This is quite "heavy" for such an object and so for the current version of Microsoft Flight Simulator 2024 things have changed to a more "modular" system that permits better polygon, material and texture management. Let's have a look at how we'd build the above model using multiple objects, starting with the model itself in our 3D tool of choice (3DS Max or Blender):
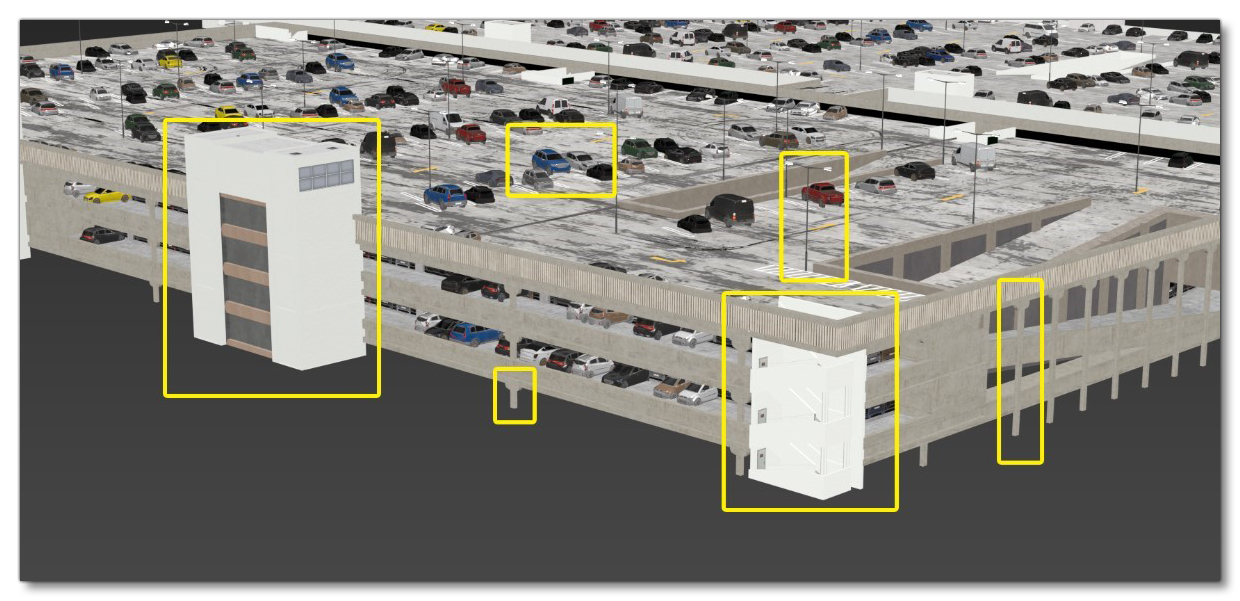
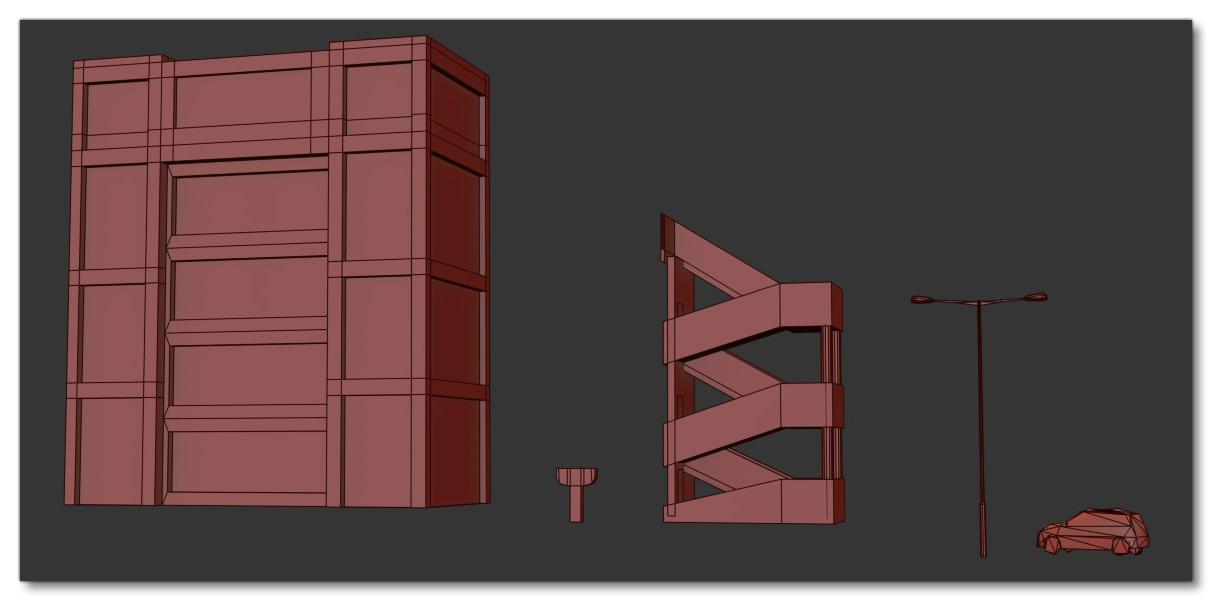
The framed elements represent the parts that can be separated from the "core" building, and turned into independent models with their own LODs and materials (but sharing textures where appropriate). So, cars, lights, pillars, stairways, walls, etc... can all be separated into individual elements which will then all be exported as single objects to be added to the scenery editor as part of a SimPropContainer object, and then these elements can fade and LOD independently, even though they are considered part of a single object. The image below shows some examples of these elements:
Once you have identified all the elements that can be separated out you will be left with a "shell" of the object containing the large-scale planes (walls, floors, ramps, etc...) which will look something like this:
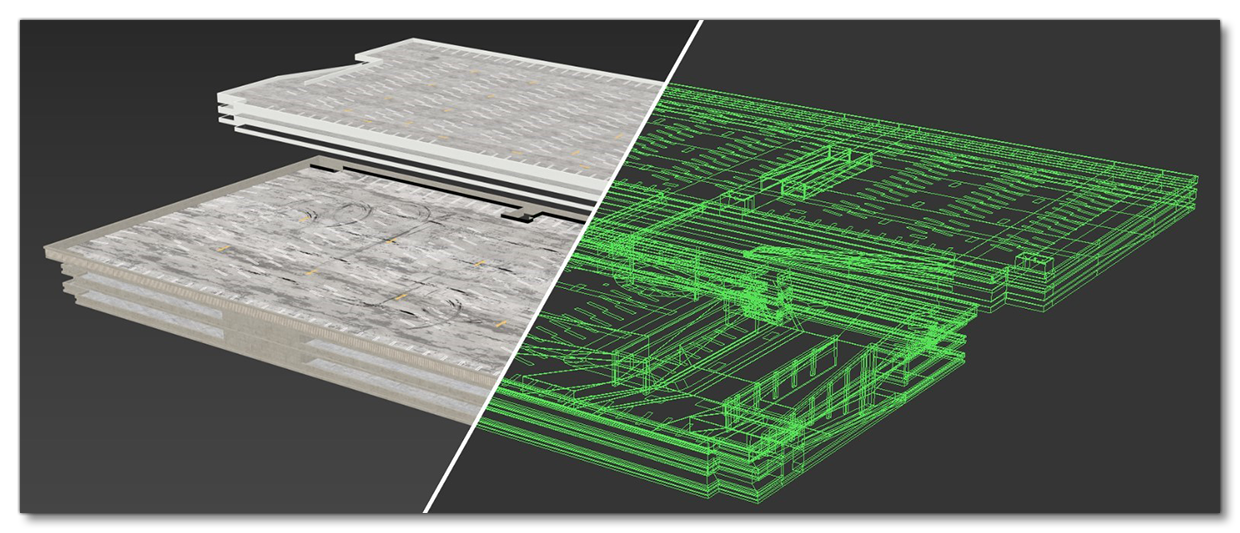
The images below shows a further example of a building from KLAX. Here we show the full building before being prepared as a SimPropContainer, then the various "prop" objects that were created from it, and then finally the building "shell" (which will also be a seperate object):

SimPropContainer LODs
The objects placed within SimProp Containers should adhere to the general LOD guidelines given here:
However to aid with their creation here is an example of a single object to be used in a SimPropContainer with each of the different LODs separated out:
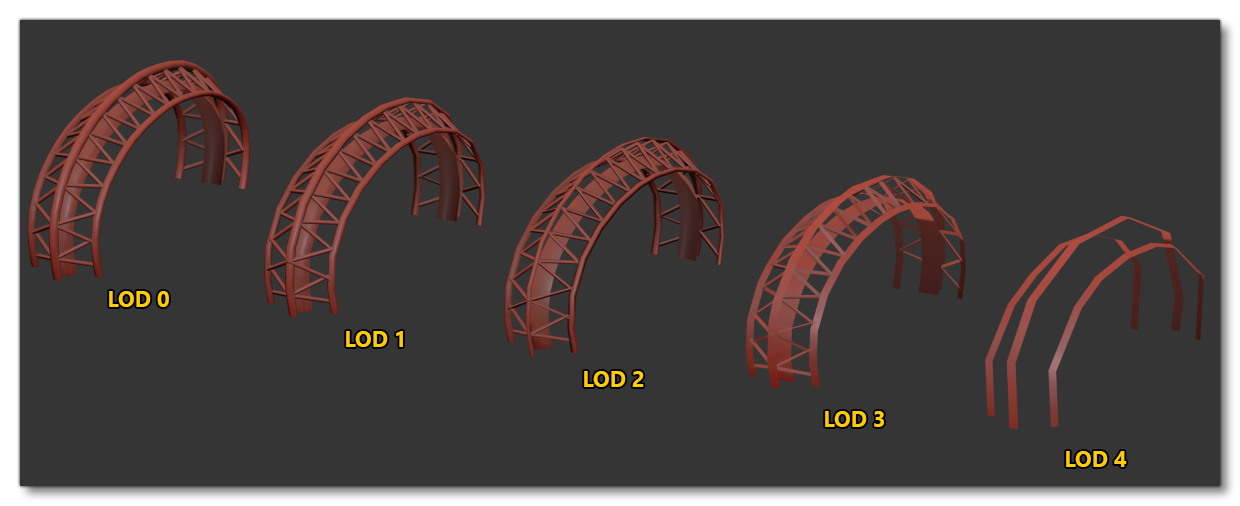
In this example, you can see clearly the decreasing complexity as you move up through the LODs, and the table below shows the statistics for each LOD so you can get an idea of the kind of reductions you should be aiming for:
| Statistic | LOD0 | LOD1 | LOD2 | LOD3 | LOD4 |
|---|---|---|---|---|---|
| Polys | 1734 | 729 | 527 | 177 | 23 |
| Tris | 3996 | 1598 | 1066 | 330 | 46 |
| Edges | 3788 | 1711 | 1210 | 555 | 72 |
| Vertices | 2185 | 1058 | 759 | 446 | 52 |
The next table gives you the approximate maximum number of vertices that can be displayed per LOD depending on the current Size On Screen percentage:
| Screensize | Vertex Count Limit |
|---|---|
| 15% | 5000 |
| 50% | 60,000 |
| 100% | 250,000 |
| 140% | 500,000 |
| 200% | 1,000,000 |
| 280% | 2,000,000 |
LOD Materials And Textures
When it comes to materials and textures, how they should be created will depend largely on the object they will be used for. For generic and tiling textures, it is important to share them as much as possible between the different SimPropContainers. For example things like concrete, brickwork, metallic textures, etc... that are used on large surfaces should be shared whenever possible. However, for the smaller objects that will disappear quickly from view, it is preferred to have a single material and unique game texture. Such objects would be traffic cones, electrical panels, fire hoses, signs, etc... Again, the LOD Technical Information guidelines should be followed as much as possible.
Exporting
When it comes time to export the different models that you wish to be used as part of a SimPropContainer, you will need to export each LOD as a unique glTF, and ensure that you create the appropriate XML for the collection of files. Below are the steps for this for both 3DS Max and Blender. Note that if the model is to be used as a SimObj, then you will also need to export the animations as a separate glTF file.
After exporting the gltf files you'll find that there are .gltf and .bin files for each LOD, and optionally an XML file for each object if the object is static with no animations. You can find more information about the structure of this XML from here: Model XML For Scenery Setup
To add the objects into the simulation to be used within a SimPropContainer, please see these sections:
3DSMax Export SimPropContainer Objects
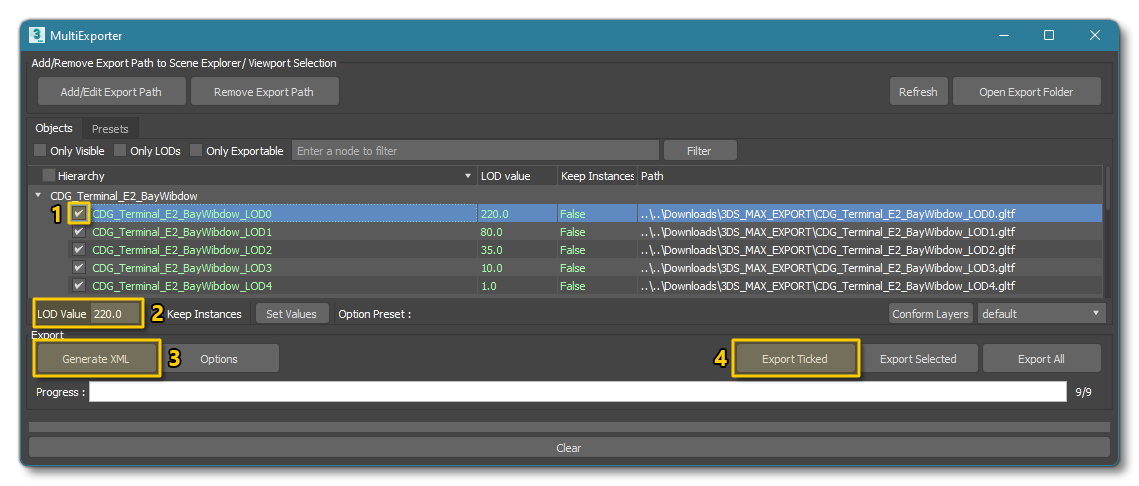
If you are using 3DS Max then you should follow these steps:
- In the Multi-Exporter window, select each of the objects that you wish to export.
- Set the LOD minSize value for each of the LODs being exported.
- Generate the XML file(s) for the SimPropContainer objects.
IMPORTANT! This step is only required if the object is static and does not animate. If the object is a SimObj, then you will need to create the XML manually, as explained here: Scenery XML And Model CFG - Export the objects for the SimPropContainer.
Blender Export SimPropContainer Objects
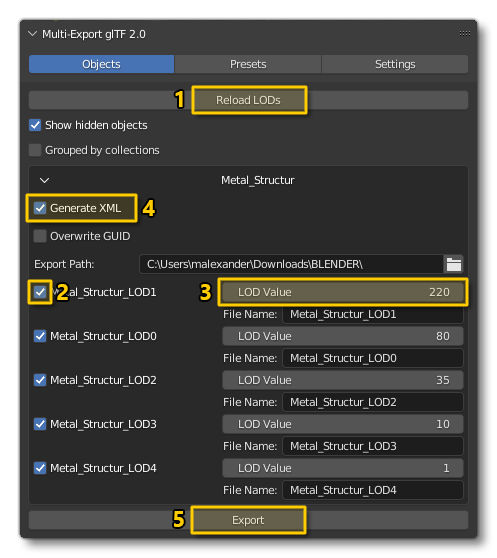
If you are using Blender then you should follow these steps:
- In The Blender Exporter window, click the Reload LODs button (ensure that each object has the correct naming, ie: prefixed with
x0_,x1_,etc...or suffixed with_LOD0,_LOD1,etc...). - Select all the LODs that you wish to export.
- Set the LOD minSize value for each of the LODs being exported.
- Generate the XML file(s) for the SimPropContainer objects.
IMPORTANT! This step is only required if the object is static and does not animate. If the object is a SimObj, then you will need to create the XML manually, as explained here: Scenery XML And Model CFG - Export the objects for the SimPropContainer.