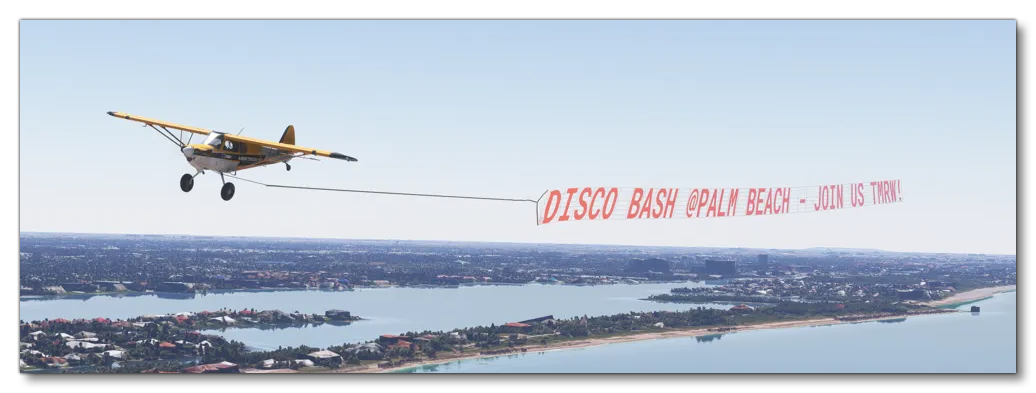
AERIAL ADVERTISING
In the Microsoft Flight Simulator 2024 career mode, one of the challenges that a user can take is to perform aerial advertising flybys. If you wish your aircraft to be used on this kind of activity you will need a preset that has been appropriately set up as part of the Modular SimObject, as explained below.

For more information on the various other career activities and how to prepare your aircraft, please see here:
Aerial Advertising Constraints
When it comes to setting up planes for the available advertising activities, there are a few requirements that must be fulfilled:
- The plane will need to have the
navigation_graph_pilot.cfg(as explained here). - The aircraft will need to have the
Apron.fltandApronWithoutCovers.fltfiles (as explained below). - The
targeted_specializationsmust include theAAD-PLNdressing code. - The
object_classmust be "Airplane". - The
operating_statusmust be either "in_service" or "experimental". - The plane cannot be flagged as military.
- The plane cannot be flagged as premium.
- The plane
ui_max_rangemust be greater than 1. - The plane must be a light aircraft with either a piston or turboprop
engine_type. This is then used in conjunction with either themax_rated_hp(piston) orrated_shaft_hp(turboprop) to determine what length of banner the aircraft can tow. As such all three of these parameters should be set up correctly. - The plane can have wheels or big wheels, for landing gear.
- The plane cannot have skis or floats for landing gear.
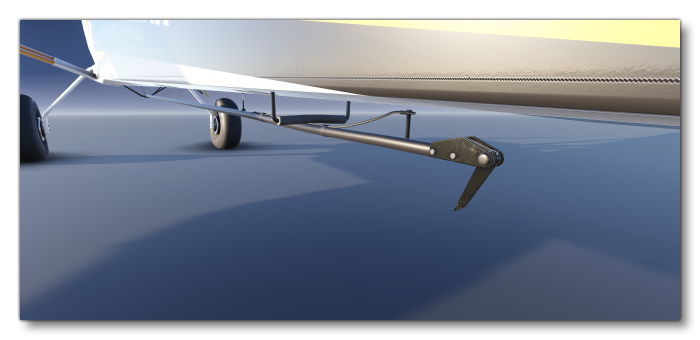
- The plane model must accurately show the hook and pole assembly which will be used to attach the advertising banner, and there must be a "helper" node in the glTF called
AD_ROPE_ATTACH. This should be placed at the point on the hook assembly where the rope for the advertising banner would be attached and should be present in all LODs. Note that if you are using the Included Attachments instead of modeling your own hook assembly, this constraint can be ignored as the included attachments will have this node included already. - The cockpit model will require a winch pole control, and a Banner Release lever.
- The power-to-weight ratio must be over 0.113 (see below for details)
The last item listed above - the power-to-weight ratio - is calculated as follows:
- If the Empty Weight == 0, then the power-to-weight ratio is automatically set to 0 as well (to avoid a division by 0 errors in the calculations)
- If the Empty Weight is > 0 then the power-to-weight ratio uses the following calculation:
$$PowerToWeight = {power \times 0.746 \over EmptyWeight}$$
Where:- \(power\) is the
max_rated_hp(piston) orrated_shaft_hp(turboprop) value multiplied by the engine count. - \(0.746\) is used to convert the power from hp into Kilowatt
- \(EmptyWeight\) is the
empty_weightvalue in kg.
- \(power\) is the
Following these constraints will give the aircraft the AAD_Cabin type. See here for more information:
Mission Flow
The flow for an aerial advertising mission is as follows:

This flow will also require the aircraft to be setup for - and follow - the General Career Mode Requirements.
SimVars
The SimVars given below are those that will be used and checked to ensure that the aerial advertising mission is performed correctly. If you are setting up your own hook and pole attachments then these SimVars will need to be used (for further SimVars related to this kind of mission please see here: Tow Cable / Hook).
| SimVar | Description |
|---|---|
GRAPPLE HOOK SET |
Check if the hook is open 1 or closed 0. |
LEAD POLE SET |
Check if the pole is extended 1 or retracted 0. |
Included SimAttachments
To make things simpler when creating your aircraft, all the components required for aerial advertising are available as Included Attachments for you to use. These are:
-
Asobo_Banner_Hook
This is the pole and hook that goes under the aircraft fuselage and that will be used to hook the aerial advert onto the aircraft. This SimObject already contains theAD_ROPE_ATTACHhelper node and all the model behaviors required to make it work.

-
Asobo_Lever_BannerRelease
This is the banner release lever that should be placed in the interior cockpit model of the aircraft. The lever SimObject already contains everything necessary for the release mechanism to work.
-
Asobo_Winch_Pole
This is the winch control for the advertising pole hook and is used to pull the advertising banner close to the plane. The winch pole SimObject contains all that is needed to use the winch control.
You can find out how to set these up from the following page:
FLT Files
When a user starts an advertising activity they will be going through the usual Preflight checks, and so they will need to have the Apron.flt setup in the activity preset as follows:
- Section
[SimVars.0]must have the parameterSimOnGroundset totrue. - All defined
[Covers]need to be set totrue(see here for more information). - Section
[Controls.0]must have the parameterParkingBrakeset to 100.00 (if the aircraft has a parking brake). - Aircraft electrics and engines must be turned off.
- The aircraft flight parameters (trim, flaps, etc...) should be set for a cold and idle aircraft.
An additional FLT file is required - the ApronWithoutCovers.flt file - for those occasions when the user may skip the preflight phase and there is an RTC event, or when something causes a Back On Track event after preflight. This file should be set up like a regular apron FLT file, however you should ensure that these changes are made: