SIM ATTACHMENTS
One of the benefits of working with Modular SimObjects is that you can create packages of Sim Attachments that can then be referenced and attached to multiple objects. For example, you can create an instrument, or a seat, or a button, etc... and then "attach" these objects to all the aircraft that would require them. This greatly reduces the resources that you need and lets you build up a package of re-usable assets for future SimObjects that you may create. It should be noted that there are also numerous "pre-made" Sim Attachments available to you for use directly in your own aircraft. You can find more details on the following page:
Creating The SimAttachment Package
To create an attachment or - a collection of multiple attachments - you will first need to create a new package from The Project Editor:

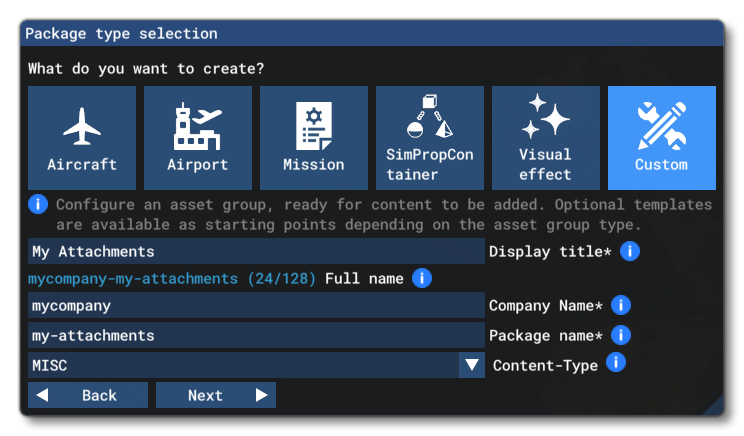
This will then open the Package Type Selection window where you should select Custom and then supply the requested details, making sure to set the content-type to one of the following:
- For instruments (including buttons, knobs, levers, etc...), use the INSTRUMENTS content-type.
- For everything else (or mixed packages with instruments and other objects), use the MISC content-type.

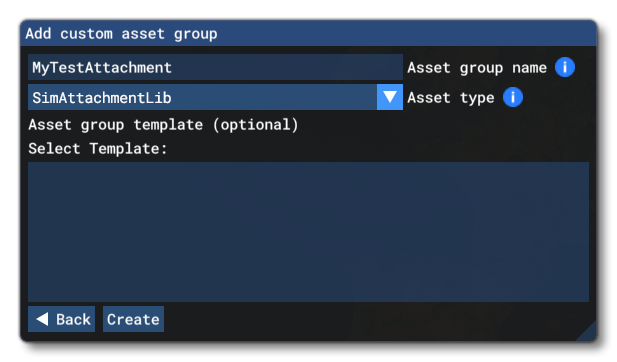
You will then be prompted for the first asset group to add. This must be of the type SimAttachmentLib, as shown below:

Once the Package has been created with the first attachment, you can then select it and click on the Open In Editor button from The Project Inspector to open the attachment in the SimAttachment Editor so that it can be edited:

SimAttachment Files
Once you have your package ready you can start to add the required files. Exactly which files you add will largely depend on the purpose of the SimAttachment, but you will probably need at least a model folder and a texture folder. You can find the full list of possible files and folders here:
A typical instrument that you would share and attach to multiple SimObjects would normally consist of the following folders and files:
- model: Contains the
*.glTFand*.binfiles for the model, as well as the Model XML - panel: Contains the panel.cfg and panel.xml files (if required).
- sound: Contains the audio
*.PCKand the sound.xml files. - texture: Contains the image files required for the object textures, as well as the necessary texture.xml files.
Note that more complex SimAttachments can be created and then edited using the The SimAttachments Editor, and at it's simplest a SimAttachment can be nothing more than a model and textures.
Using The SimAttachment
Once you have created your attachments you will need to reference them in the SimObject. For that you will need to do two things:
- Have the required node setup in the SimObject model.
- Have the required settings in the attached_objects.cfg file for the SimObject.
NOTE: We are talking about referencing the SimAttachment from a SimObject, but you can also reference attachments from other attachments.
In this file you will need to add an [SIM_ATTACHMENT.N] section, and there you will give the path to the attachment model.xml file, and a few other details depending on whether the attachment is being attached to the SimObject or another attachment, for example:
[SIM_ATTACHMENT.0]
attachment_root="SimAttachments\MyInstruments\instrument_1\"
attachment_file="model\instrument_1.xml"
attach_to_model="interior"
attach_to_model_minsize=1
attach_to_node="INSTRUMENT_ONE_HOLDER"
alias="Interior_Instrument_One"
Once this is setup, you should be able to build the sim attachment, then build the parent project that references it and see it in the simulation. To help with debugging you can use the Debug LODs options, as well as the the Behaviors Debug window (if the object has model behaviours). It's also possible to edit the position of the attachment locally without having to edit the model node it's being attached to by using the relevant parameters in the attached_objects.cfg file (see: attach_offset, attach_pbh, and attach_scale).