SETTING UP WWISE
This section of the tutorial is dedicated to setting up Wwise, ready for it to be used for creating sounds for your own aircraft. We strongly suggest that anyone who is unfamiliar with the Wwise workflow take a moment to go through this section and ensure they fully understand the recommended workflow that we outline here. You may also wish to take a few moments to watch the video that we have provided to help you get started:
NOTE: If you are using this tutorial to learn Wwise and don't have an aircraft project setup yet, you can use the Simple Aircraft Sample Project as an example to understand the whole process of integrating sounds in an aircraft.
In general all audio creation for Microsoft Flight Simulator will follow the same process which is:

We have covered the recording of audio here - Recording Audio - and we'll cover the creation of the sound.xml file and testing within the simulation here - Creating The Sound.xml. So, in this section we'll be taking you through the steps shown in orange, and use them to create a basic stall warning sound in Wwise and then generate the PC.PCK file that will be used by the simulation to play the sound.
Create Your Audio Work Unit
To start with you will need to have the WwiseSampleProject open in Wwise, then you would go to the Audio tab and expand the folders to find the AIRCRAFT_PLAYER folder:

When you expand this folder you will see that there are already a couple of work units that have been created as part of the project (this includes one for the Simple Aircraft sample project, which can be ignored for this tutorial even if you are using that sample project as a base for learning).
NOTE: Work Units are distinct XML files that contain information related to a particular section or element within the current project. These Work Units are designed to help you organize and manage the different elements within a project.
You now need to do the following:
-
Create a new work unit by right-clicking on the
AIRCRAFT_PLAYERand selecting New Child then Work Unit.
 Here you would name it the exact same as the aircraft package that you are creating, something like "MyCompany_AircraftName".
-
You now want to create a new sound effect and import the require WAV file. For that you right-click on the work unit that you just made, and then select New Child and Sound SFX:
 You will want to name it
 stall_warningand you'll also want to tick the Loop and Infinite boxes, since we'll want this sound to loop "infinitely":

-
You would then add the sound file itself that is to be associated with the
stall_warningSFX. This can be done by either:-
dragging the WAV file from the file explorer window onto the SFX Unit that you just created, then clicking on the Import button.
-
going to the Project menu and selecting Import Audio Files, then clicking on the Add Files button and browsing to the location of the file you want to add. Once selected, click on the Import button.

-
Once you have the sound imported, you can double-click on the waveform icon to open the wave data Source Editor for the sound. Here we recommend that you set the loop points and crossfade values (you won't need to do this for all sounds, but for a looping sound it's important to check and get this right):

Note that there are a lot more settings that you can adjust in Wwise through the different tabs and menus, but we won't be covering those as they are all explained through the Audiokinetic documentation on their website.
Create Your Audio Events
Now that we have set up our audio, we need to link it to a Wwise event. For that you'll need to do the following:
- Go to the Events tab and create a new work unit in the
AIRCRAFT_PLAYERfolder, naming it the same as you named your audio work unit (in this example we used "MyCompany_TestAircraft"). - Now you need to right click on this new work unit and select NewChild then Play:

The way that you name this play event is very important and must follow the correct naming convention, which is:
Play_[SoundbankName]_[WwiseEvent]
- where
[SoundbankName]will be the name of your Soundbank and your PC.PCK as defined in thesound.xml(which we will explain in more detail here: ). - and
[WwiseEvent]is the name of your event that you will set up in thesound.xmlassociated.
The image below shows how the Event tab should now look:

It is very important that the sound event follows this exact naming convention, since the "stall_warning" part will be what links the sound to the actual event within the simulation. This is discussed in more detail in the next section on Creating The Sound.xml, but for now ensure the sound is named exactly as shown.
NOTE: For more detailed information on the naming conventions required by Wwise events, please see here - Event Naming Convention.
Ensuring that the new event is selected in the Events tab, you need to now go back to the Audio tab. From there you can click and then drag the stall_warning SFX unit onto the new event that we just created, setting it as the target. This will automatically create a "Play" action linked with the sound of the stall warning:

IMPORTANT! This is just one example of creating a work unit in Wwise, however you will need to create work units for all of the audio content you will be creating, including:
• Actor-Mixers
• Events
• Soundbanks
• Sharesets
• Game Parameters
• Sessions
• Sessions Queries
Generate The SoundBank
You have successfully created your sound event and added an audio work unit to it, which means it's time to create the SoundBank that will contain the sound event (and future events). For that you will need to do the following:
- Go to the SoundBanks tab
- Right click the
aircraftswork unit then select New Child and then SoundBank:

You need to name your Soundbank according to the Naming Convention as, explained before in the Create Your Audio Events section: in our example images, it's MyCompany_TestAircraft. Now you should switch to the SoundBank layout, which you can do from the Layouts menu (or pressing F7), and select your new SoundBank. In this layout, go back to the Events tab, then drag and drop the event unit into the SoundBank Editor:

Finally, to generate your SoundBank, go to the SoundBank Manager, Tick all the boxes (as in the image below) and click Generate All:

When the generation is completed, you will get a window informing you and showing the output log (which is also where you can see any potential issues, like missing plugins).

With that done, you have almost completed the necessary steps to create the audio required by your aircraft. The last step is to create the audio package itself from the generated SoundBank.
Create The PCK.PC (Audio Package)
The final stage for getting audio into your aircraft is to generate the PC.PCK files. These are audio "packages" that will be placed in the sound/soundai folders of the aircraft, and these are made using a separate Wwise tool: the AudioKinetic FilePackager. This can be found in the Wwise install directory, normally:
C:\Program Files (x86)\Audiokinetic\Wwise 2019.2.5.7349\Authoring\x64\Release\bin\Tools\FilePackager.App.exe
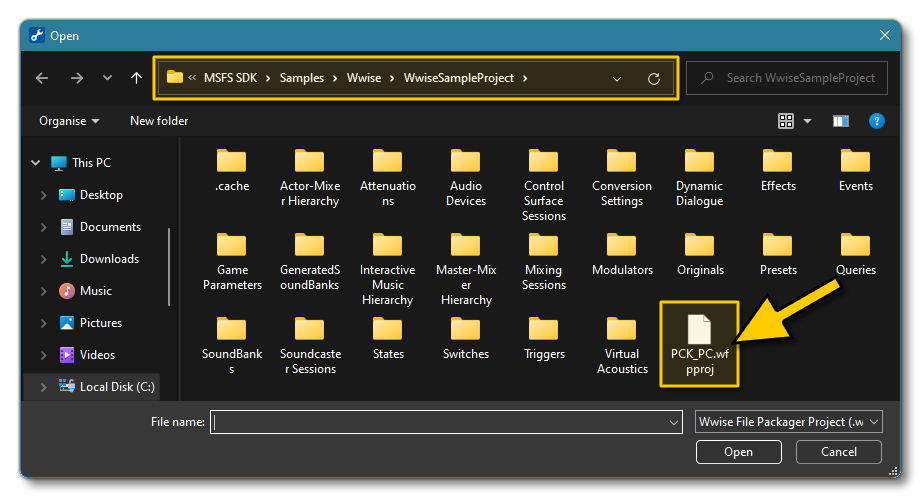
On running the FilePackager, you will need to go to the File menu and select Open, then browse to the "package project" PCK_PC.wfpproj located in the WwiseSampleProject folder:
With the package project open, you then need to do the following:
- Click on the Add button to add a new PC.PCK to the Packages list
- Name this package the same as you named the SoundBank and other components (in this example we've been using MyCompany_TestAircraft, so the package is called MyCompany_TestAircraft.PC.PCK).
- Once you have the named the package, you need to add the soundbank to it, which is done by simply clicking on the appropriate SoundBank, then dragging it into Package Contents section.

With that done, all that's left to do is go to the Generate menu, and then select Generate All. After generating, you should fined that the new PC.PCK package is in the GeneratedSoundbanks folder of the WwiseSampleProject, normally located here:
\MSFS SDK\Samples\Wwise\WwiseSampleProject\GeneratedSoundBanks
You should now copy this file into the sound folder of your aircraft project, usually found here:
<ROOT>\[MyCompany_MyAircraft]\PackageSources\SimObjects\Airplanes\[MyCompany_MyAircraft]\
