USING INCLUDED SIM ATTACHMENTS
To make things simpler when creating your aircraft, some of the components required for activities are available as Included Attachments for you to use. These are all mentioned on the corresponding pages for the careers that have them:
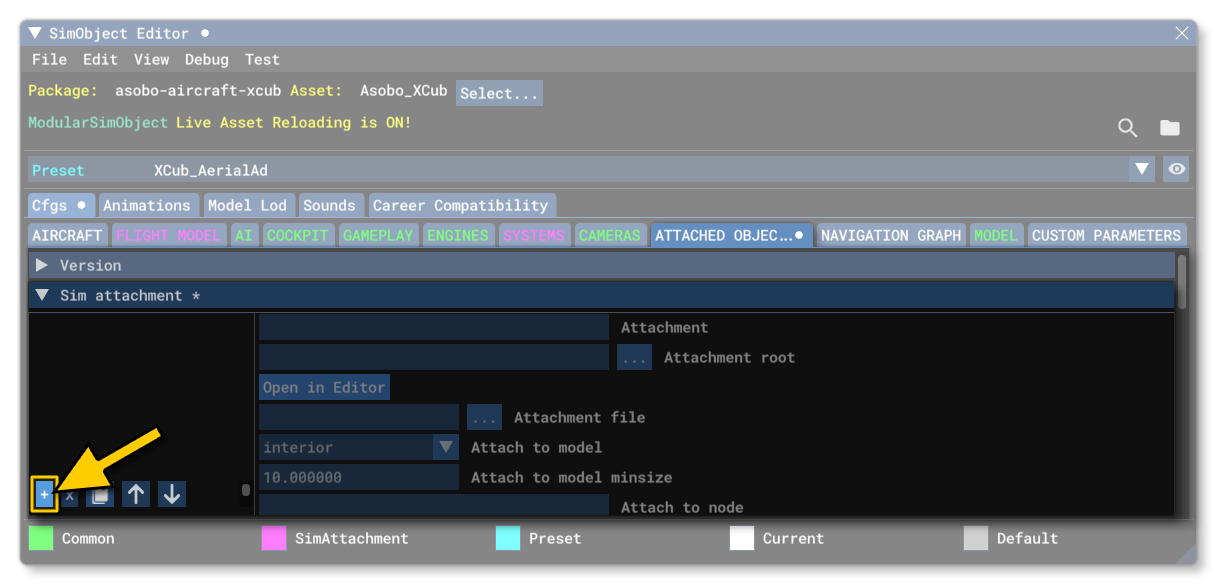
You can find these attachments in The SimObject Editor. When you create your aircraft preset to be able to perform these activities you can setup the attached_objects.cfg to reference the attachments listed on the pages above by doing the following (the example we are using is for Aerial Advertising):
- On the page for the attached objects, select the Sim Attachment section, then click on the
+to add a new attachment.

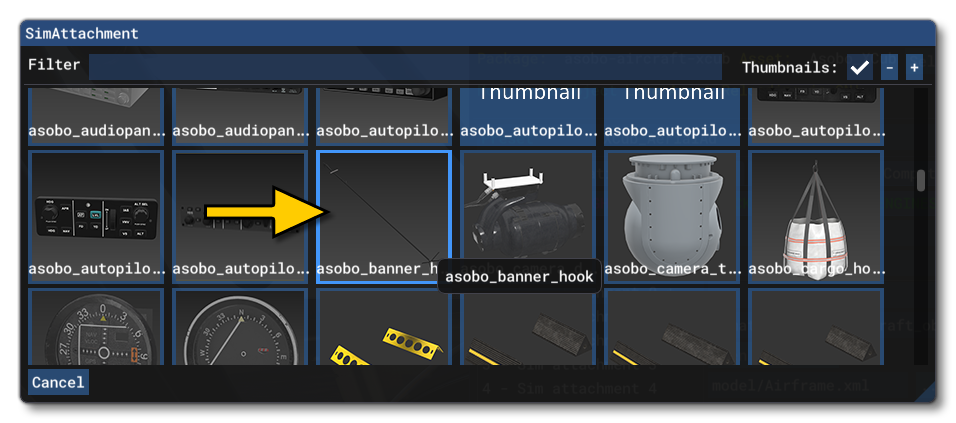
- The next step is to select the Attachment Root, which requires you to click on the
...button to open the SimAttachment Explorer. This new window will show all the SimAttachments you have registered for the package as well as all the pre-made included attachments. In the image below we are adding theAsobo_Banner_Hookattachment:

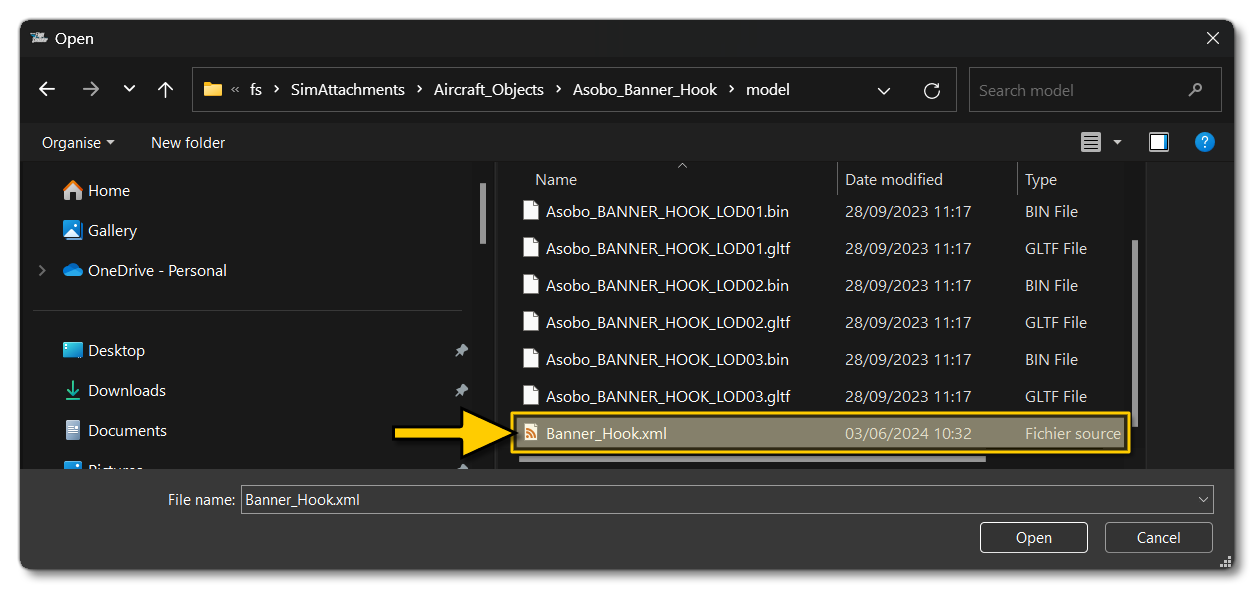
- Having selected the attachment root folder, you can then select the file that governs what the attachment does. This is done from the Attachment File parameter and, again, clicking the
...will open an explorer where you can select themodel.xmlto use:

- Having selected the SimAttachment, you will need to select whether it should be attached to the interior or exterior model, and then select where it should be attached. You can do this manually using the X/Y/Z coordinates relative to the Datum Reference Point, or by specifying a node or helper in the glTF.
- You will need to ensure that the options Always Execute Associated JS and Always Execute Model Behavior are checked.
- You should supply an alias for the appropriate sim attchments, in this example it's the interior attachments, winch pole and banner release lever.
Related Topics