THE SIMOBJECT EDITOR
The SimObject Editor allows to you to edit and debug any modular SimObject that has been loaded as part of a package into The Project Editor. To see an example of a simple modular SimObject package you should look at the SimpleAircraft sample project, or - for a complete and detailed modular SimObject - look at the DA62 sample project.
NOTE: For more information on modular SimObjects, please see here: Modular SimObjects
Once you have loaded a package with a SimObject into the Project Editor, you should build the package and then - when it's built - start a flight. Once the flight has started, you can select the SimObject in the Project Editor and then in the Inspector click on the Load In Editor button. This will open the SimObject in the editor:
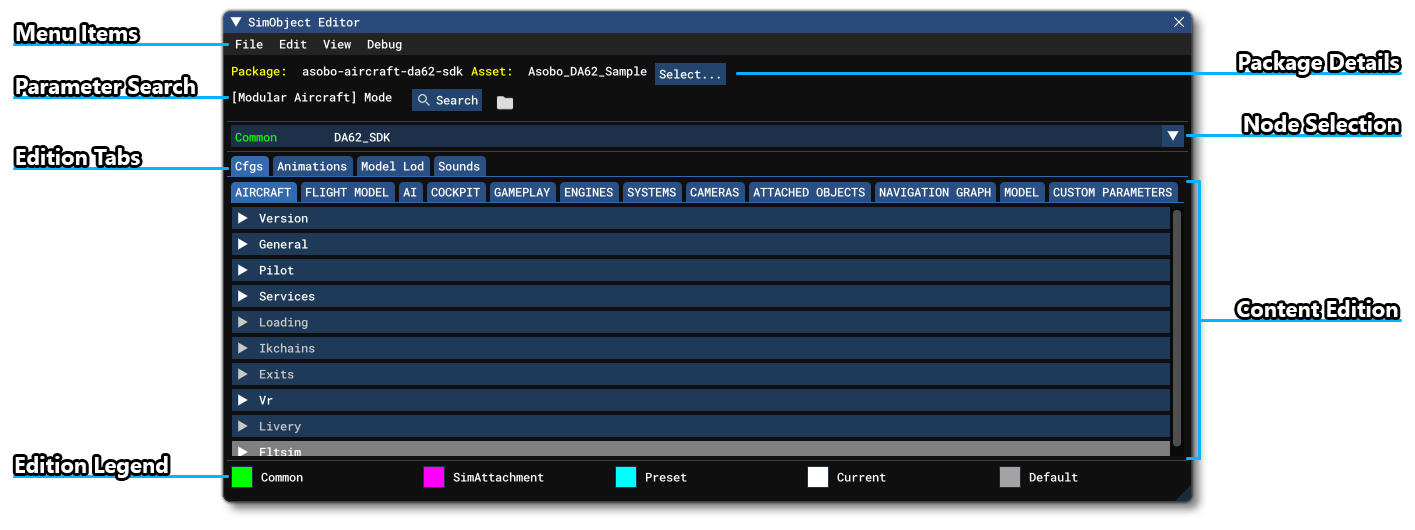
The different sections of the editor are as follows:
-
Menu Items
The main menu items for the editor. See here for more information: Menus
-
Package Details
Here you have the currently selected package. TheSelectbutton can be used to switch between different packages that you may have loaded in the project editor or built in the VFS.
-
Edition Information (Live Edition)
In this section of the editor you can find information about the package being edited, and what edition options are enabled. There is also a switch that can be used to enable / disable Live Edition. When Live Edition is enabled, saving the files (either using
Ctrl+Sor from the File menu) after edition will cause a resync and reload the SimObject files in the simulation, using the edited parameters.
NOTE: This does not build the package, just load and apply the CFG file parameters, so the model and other files will not be reloaded, even if changes have been made.However, certain parameters may be edited in their respective tabs, and the changes will be reflected in the simulation immediately, without the need to save and rebuild. This option is available for parameters in the following sections:- Cockpit
- Camera Definitions
- Lights
- Interactive Points
- Contact Points (
position, only) - Sim Attachments (
attach_offset,attach_pbh, andattach_scale, only)
Please see the relevant pages for the exact list of parameters that can be edited live for each tab/section.
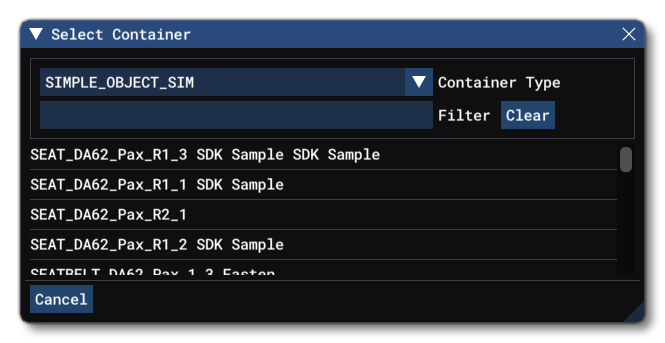
It is worth noting too that the name of the "container" currently being live-edited is listed here too, and you can click on its name to bring up the container list and change to a different one, if required:
-
Open Explorer
This button can be used to open the File Explorer on the main folder for the current modular node being edited.
-
Parameter Search
Clicking this button will open up the Search Parameter window:
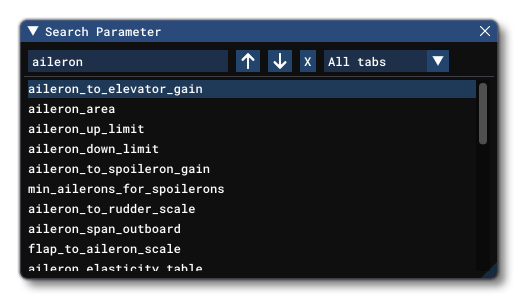
Here you give a search term to use then press
Enterand the window will be populated with a list of parameters that contain the term you gave. You can then use the↑and↓buttons to move between the parameters in the list, and the SimObject Editor will automatically expand the sections and highlight the parameters as they are selected. You may also filter the list of parameters by changing the "All tabs" option to the tab that you want to filter for, and you can clear the filter and search term by clicking on theXbutton. For a full list of the SimObject Parameters available please see here: The SimObject Editor Parameter Index
-
Modular Node Selection
From this menu you can select a different node of the modular SimObject to edit. For more information please see here: Modular SimObject Nodes
NOTE: If you are loading a legacy SimObject this section will not be present.
-
Node Controls
The buttons here can be used to do the following (note that not all buttons are available for all modular nodes):
-
✎- This will let you rename the currently selected modular node (only preset and livery nodes can be renamed). -
🗑- This will delete the current node (not available for the common node). -
👁- This will toggle on or off the global or current node view. When the global view is off, only the files and parameters that exist in the current modular node will be displayed in the Content Edition section of the editor.
-
-
Edition Tabs
These are the main edition options of the editor, and each tab will change the editor contents to show different information. The edition tabs available are as follows:
-
Content Edition
This section is where the actual edition of the SimObject will be done. The contents of this section of the editor will depend on the currently selected Edition Tab. When editing the information here, it is not immediately written to files but instead it is held in memory until you save the project. Note that if Live Edition is enabled, then saving the project will perform a "save and apply" so you can apply the CFG file changes in the simulation when you save.
-
Edition Legend
Shows the colour coding used by the editor to easily identify the origin of parameters and files.
Modular SimObject Nodes
In previous versions of Microsoft Flight Simulator 2024, SimObjects were "monolithic", meaning that they were created as single entities and if you wanted to have variations on the object (for example: an aircraft with floats, with wheels, etc... or a car with the same wheelbase but different bodies) then you would have to create the entire object multiple times, with each version having just those differences. This meant that a single SimObject package could have in reality multiple objects within it, which bloated the file size, and was harder to optimise within the simulation. To resolve this, SimObjects are now created as Modular SimObjects. You can find all the relevant information related to the files required by modular SimObjects as well as how the different files are all merged together on the following page:
With reference to the SimObject Editor, when you create a new modular SimObject, the default edition will be done on the Common files (the "base" files), and at the top of the editor you now have the option to select between the different nodes (parts) of the aircraft - the common files, the attachment files, and the preset files:

When you click on this, you will be presented with the available modular SimObject nodes:

From this sub-window you can expand on any of the main categories (Common, Preset, SimAttachment or Livery) and then select from the any of the existing modules listed underneath. You can also filter the listed modules by adding text into the filter box at the top, and clear the filter using the Clear button. Selecting any of the listed module will then update the editor so you can edit the various files associated with the selected module.
NOTE: You can see the hierarchy and connections between modular nodes from the The Modular SimObject Graph window.
Within the editor, after selecting any node from the list, the various sections will be colour coded to show at a glance which sections/parameters/configurations are inherited or changed by the various other nodes. For example, this image shows a preset and the CFG sections/parameters inherited from common files and attachment files:
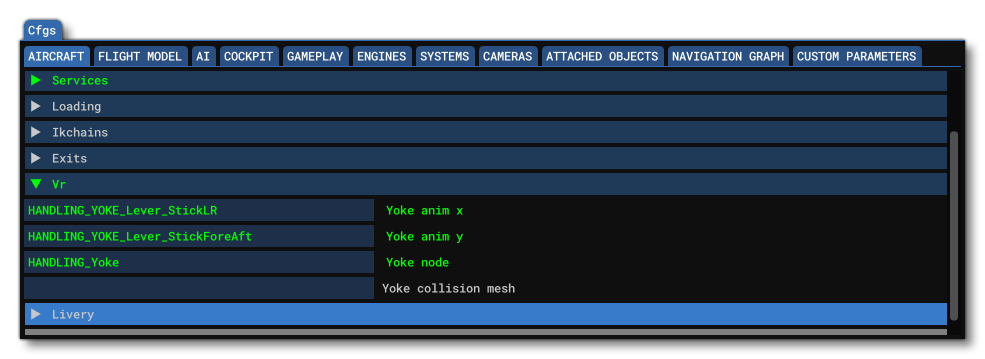
The following key colours are used:
- Green - The section/parameter comes from the common files
- Purple - The section/parameter has come from an attachment.
- Aqua - The section/parameter has come from a preset.
- White - The section/parameter comes from the node that is currently being edited, and has had its values changed/edited.
- Default - the section/parameter has not been edited and is either set to it's default value for all nodes, or is not included in any nodes.
- Red - The section/parameter has been misconfigured and should be fixed before saving. Note that a misconfigured parameter may also be one that is missing since any required parameter that is not defined in the common files or an attachment will be flagged in red in the associated preset.
- Yellow - This colour is only used for "focused" parameters. For example if you use the
Ctrl+FSearch Parameter window to find a parameter, it will be shown in yellow, or if you select a node in the navigation graph, all the associated parameters will be highlighted in yellow.
Parameter Hierarchy
As explained in the section above, some parameters will be coloured to show what part of the aircraft they come from. However, it's possible to have - for example - multiple attachments that contain the same files and parameters, and the final value of any specific parameter will be determined by the merge process (as explained here: Merge Rules). If you hover over the parameter name in the SimObject editor, you will be able to see the file that the parameter value comes from:

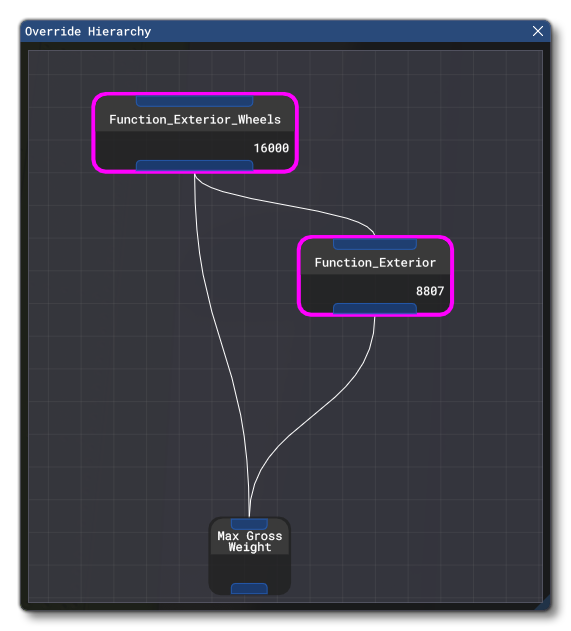
If you want to see the full file hierarchy for the parameter, then you can click on it to open the Override Hierarchy window for it. IN this window you will be able to see all the files that have the clicked-on parameter, and how those files are connected within the modular SimObject hierarchy. Essentially this window is a smaller version of The Modular SimObject Graph and its contents cannot be edited (except to move the nodes around if required for clarity):
Creating Attachments, Presets, and Liveries
When creating any new SimObject, you will have gone through The Project Editor and have a used a template to start with. This will usually include the common files, an attachment, and one or two presets. These can then be edited as normal, however you may need more attachments, presets, or even liveries, and these can all be added through the SimObject Editor.
Presets
To add a new preset to your SimObject you need to go to the File menu and select the Create > Preset option. This will open a sub-window requesting that you give the Company Name and the Preset Name, and then - after clicking on the Create button - the preset will be added into the Modular node list.

Selecting the preset will load the preset files into the editor, and colour any common or attachment parameters appropriately. You can then go ahead and edit the preset files the same as you would edit any other object files.
Attachments
To add a new attachment to your SimObject you need to go to the File menu and select the Create > Attachment option. This will open a sub-window requesting that you give the Attachment Name, and then - after clicking on the Create button - the attachment will be added into the SimObject node list.

Selecting the attachment will load the associated files into the editor, and colour any common or preset parameters appropriately. You can then go ahead and edit the attachment files the same as you would edit any other object files.
It should be noted that you are not limited to creating your own attachments. There are a number of "pre-made" attachments that can be included within your projects. These attachments are available from the attached_objects.cfg tab of the editor, where you can add a new SimAttachment, and then in the attachment_root parameter you can click the ... button to open the file explorer which will list all the attachments you have created for the project, as well as all the "pre-made" attachments included as part of the Microsoft Flight Simulator 2024 SDK.
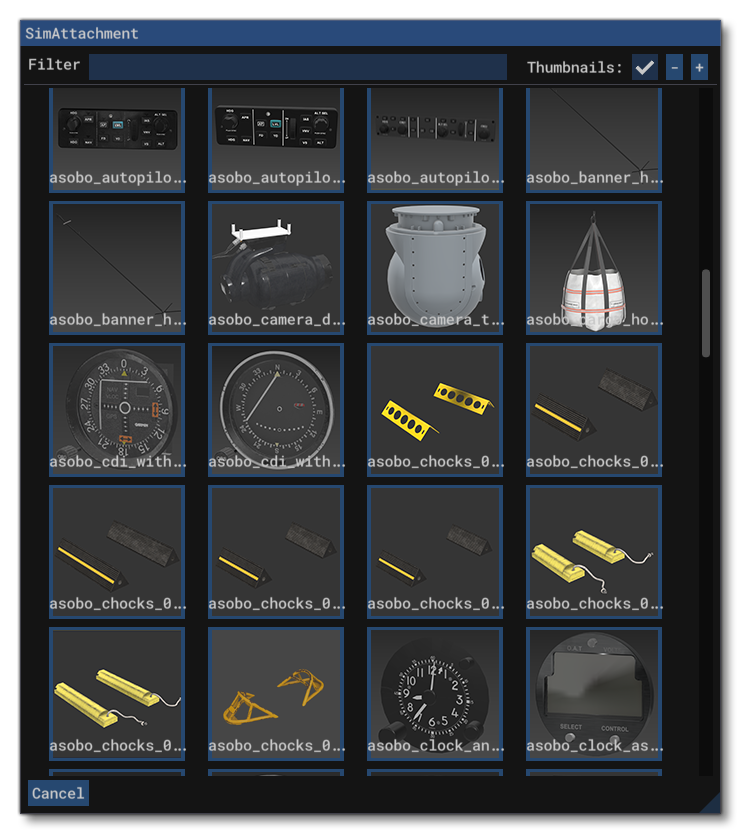
Once you have selected the attachment to use, click on the ... button for the attachment_file parameter and browse to the model directory and select the model.xml file for the attachment. For more information on these attachments, please see here:
Liveries
To add a new livery to your SimObject you need to go to the File menu and select the Create > Livery option. This will open a sub-window requesting that you give the Livery Name, and then - after clicking on the Create button - the livery will be added into the SimObject node list.
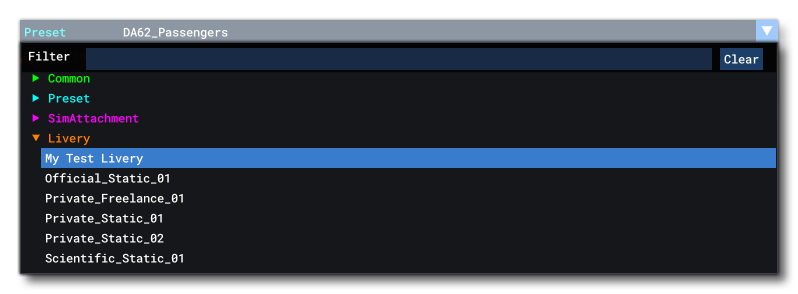
Selecting the livery will load the associated files into the editor, and you can then go ahead and edit the livery files the same as you would edit any other object files. For more information on liveries, please see here: