WINDSHIELD AND WINDOWS
This page talks about how to texture all the glass elements (windshields and windows) of the aircraft being modeled. For these textures you will need to use the windshield material, unless you want to setup "simulated" windows, in which case you should see the page on Parallax Windows (these are useful for large aircraft like airliners where you don't want to model the entire interior geometry). You are also encouraged to add Sky Portals, which are a type of light used to simulate the way sunlight is channeled through a window and which should be placed on all aircraft windows (including the windshield) where there is an interior.
To set up the WindShield material you have multiple parameters that can be changed to affect the final look of the glass. To start with we'll look at the basic parameter setup, then further down this page we'll go into more detail about specific options:
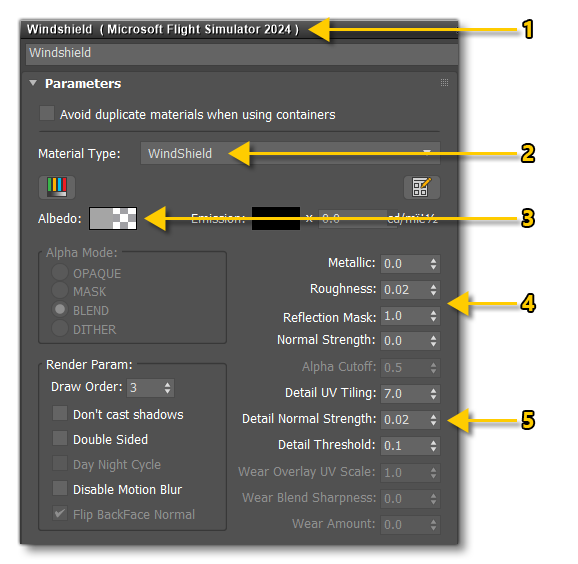
- Create a new FlightSim material
- Call it "WINDSHIELD" and set the Material Type to Windshield as well
- Set the alpha of the Base Colour to approximately 0.01, and set the base colour to white (you can use another colour if you want to tint the window, or you can supply a Base Color (Albedo) texture to give colour). Note that you can change the alpha value to change the opacity of the glass. Alternatively you can set the colour to white and the alpha to 0 and supply a Base Color (Albedo) texture instead, where the colour components will be the glass tint and the alpha component will set the opacity (this is not the recommended method, however).
- Set the Roughness to either 0.0, or a very small value if you want to use the roughness channel, and the Metalness should be set to 0.0. The Reflection Mask should be set to 1 (as the reflection amount is controlled by the Red component of the Reflection (R), Roughness (G), Metallic (B)). The Normal Strength is usually set to 0.0 as well, unless you supply a Normal texture, which isn't necessary and not recommended. You can create your own textures for this, or you can find versions of these textures which you can use in your own aircraft in the Shared Assets folder installed as part of the Microsoft Flight Simulator 2024 SDK.
- To start with, the detail values may be greyed out or be set to their default values, but they will be required later when you add a Details 1 (R), Icing Mask (G), Details 2 (B) texture and a Detail Reflection (R), Detail Roughness (G), Detail Metallic (B) texture.
The different textures that you will need are explained in each of the sections below, as well as the other parameters that are available. When working on the windshield, it is worth noting that you have some extra debug parameters included as part of the windshield material. You can find more information from the following link:
Rain Effects
Unlike previous versions of the simulation, in Microsoft Flight Simulator 2024 you do not need to set up specific UV's to handle the rain, as it is now all handled by a shader in the simulation automatically. However you still need to enable this shader using the Receive Rain parameter in the Windshield material options:

After exporting the aircraft you can then test the rain effect in the simulation by using the Windshield Rain option in DevMode:
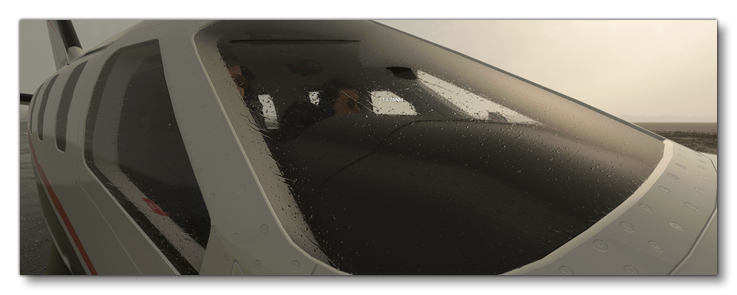
Note that when creating the cockpit (or cabin) windshield glass (rather than the airframe windshield glass) you will need to check the Rain On Backface option, which will invert the vertex position in the shader for spawning the rain.
Scratches and Fingerprints
To make things more realistic you can have dirt, scratches and even fingerprints on the windows of your aircraft.
NOTE: this section is specific to glass elements, but if you want information on adding dirt to the airframe, please see the Dirt And Grime section.
This is done using a composite material texture placed in the Details 1 (R), Icing Mask (G), Details 2 (B) texture slot where the colour components correspond to the following (note that the contrasts of the components have been exaggerated so the actual image contained is clearer):

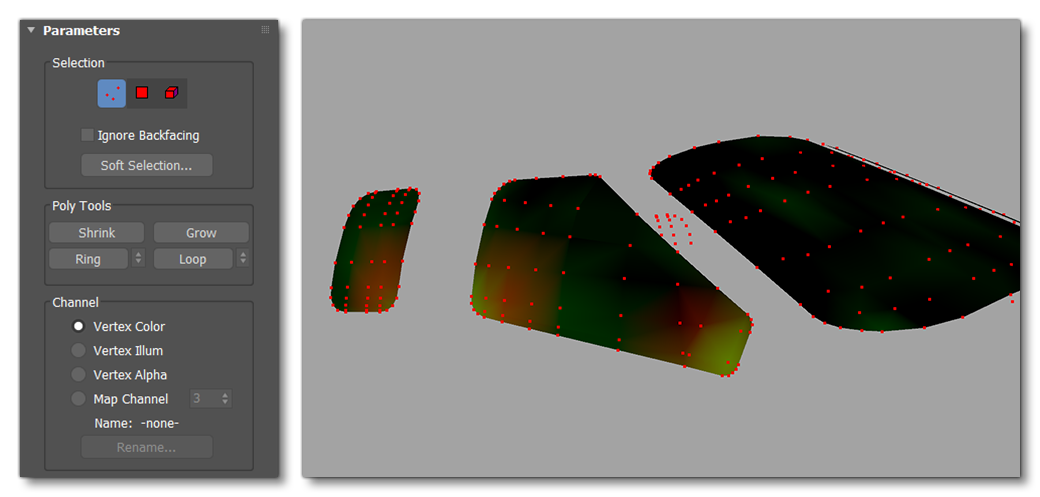
You can then apply the two channel textures using the vertex paint modifier to paint on the vertex colours, where:
- Red = Scratches
- Blue = Fingerprints
NOTE: The icing mask channel (G) is discussed in the section on Icing.
Note that you can use the Detail UV Scale / Detail UV Tiling parameter to adjust the scale of the texture as it is applied to the windshield to ensure that everything looks just right. You can also use the Detail 1 (R) Rough, Detail 1 (R) Opacity, Detail 2 (B) Rough, and Detail 2 (B) Opacity values to adjust the global opacity and roughness for the material.
Icing
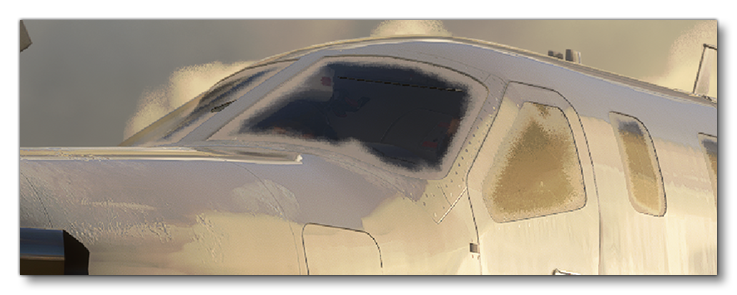
To show ice creeping over the windshield, we will use a couple of textures and some vertex painting: essentially a combination of vertex alpha, the (G) component of the Details 1 (R), Icing Mask (G), Details 2 (B) texture, and an Icing Normal texture.
NOTE: this section is specific to glass elements, but if you want information on adding ice to the airframe, please see the page on Ice.
To start with, use the vertex paint modifier to paint the vertex alpha on the windshield and windows, paying attention to higher alpha values where more icing will appear (generally around the corners and edges), and lower alpha values for the areas with least icing, for example:
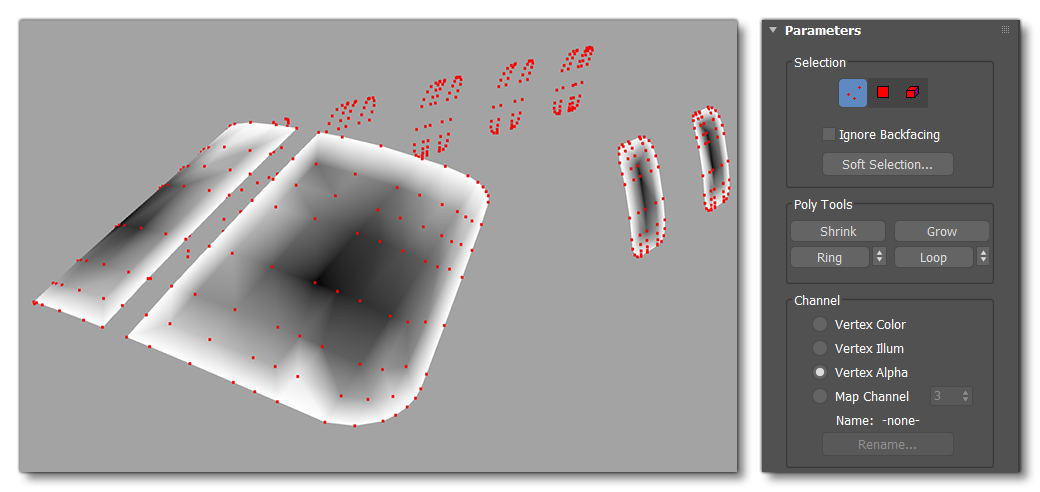
Once that's done you can add in the required textures, which will look something like this:
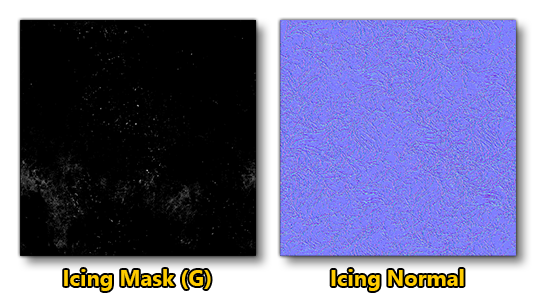
You can create your own textures for this, or you can find versions of these textures which you can use in your own aircraft in the Shared Assets folder installed as part of the Microsoft Flight Simulator 2024 SDK. They are called:
GLASS_DetailMap01_mask.pngFrost_Detail_norm.png
Note that you can adjust the UV scales to ensure that everything looks just right, and you can test the results in the game by using the Icing option in DevMode.
Wipers
The Windshield material has an option to use a Wiper Mask (RGBA) texture to create realistic wiper effects, including dust streaks and the clearing of raindrops as the wiper moves.
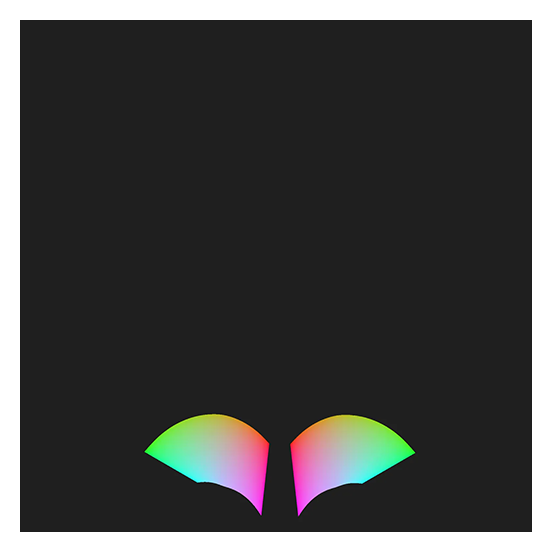
Creating this texture can be quite tricky and so there is a tool available to you (installed as part of the modelling Plugins with the SDK) to help with this process. Instructions on how to use the tool to generate the wiper mask texture can be found for both Blender and 3DS Max on the following page:
Once you have generated the texture and added it into the Wiper Mask (RGBA) texture slot, you can then set up the material Windshield Parameters (Wipers).Since the material is an animated material you will need to setup the keyframes and values for the Wiper Animation Wiper1 State value. The animation needs to be over 10 frames where frame 1 is the rest position and frame 10 is the wiper at full rotation, the highest position. So for frame 0, Wiper1 State should be 1, and for frame 10, Wiper1 State should be 1. You can then set the rest of the wiper parameters as required.
IMPORTANT! The Material animation feature works only with FlightSim materials, MultiMaterials are not supported.
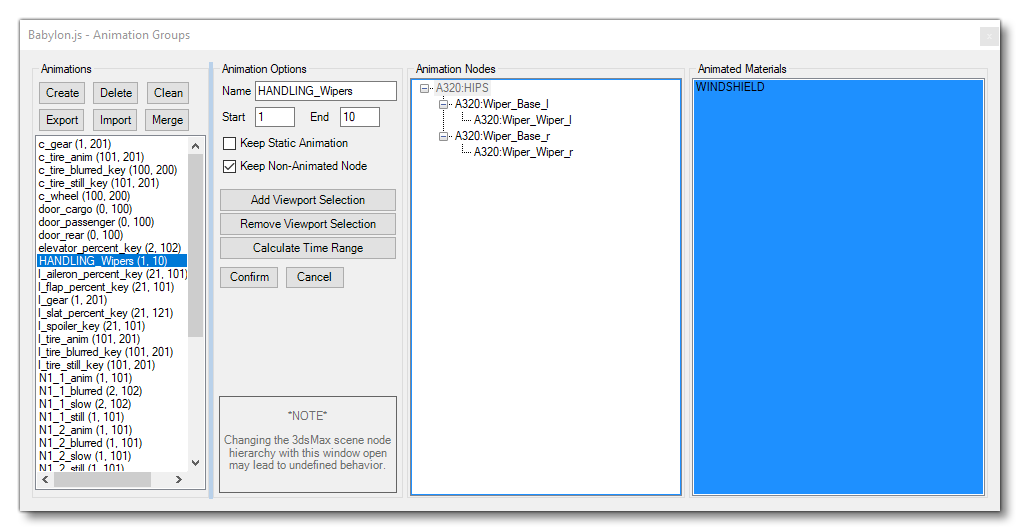
An additional step is required in 3DS Max, which is to set up the animation groups. So, with the Windshield node selected, open the Babylon Animation Groups window and, on the assigned Animation Group, add the material selecting the "Animated Materials" panel in blue and clicking Add Viewport Selection:
After having followed these steps, you can export the aircraft at any time. The material and its animation will now be used within the simulation and you will get the full benefit of the visual effects and realism that they offer.
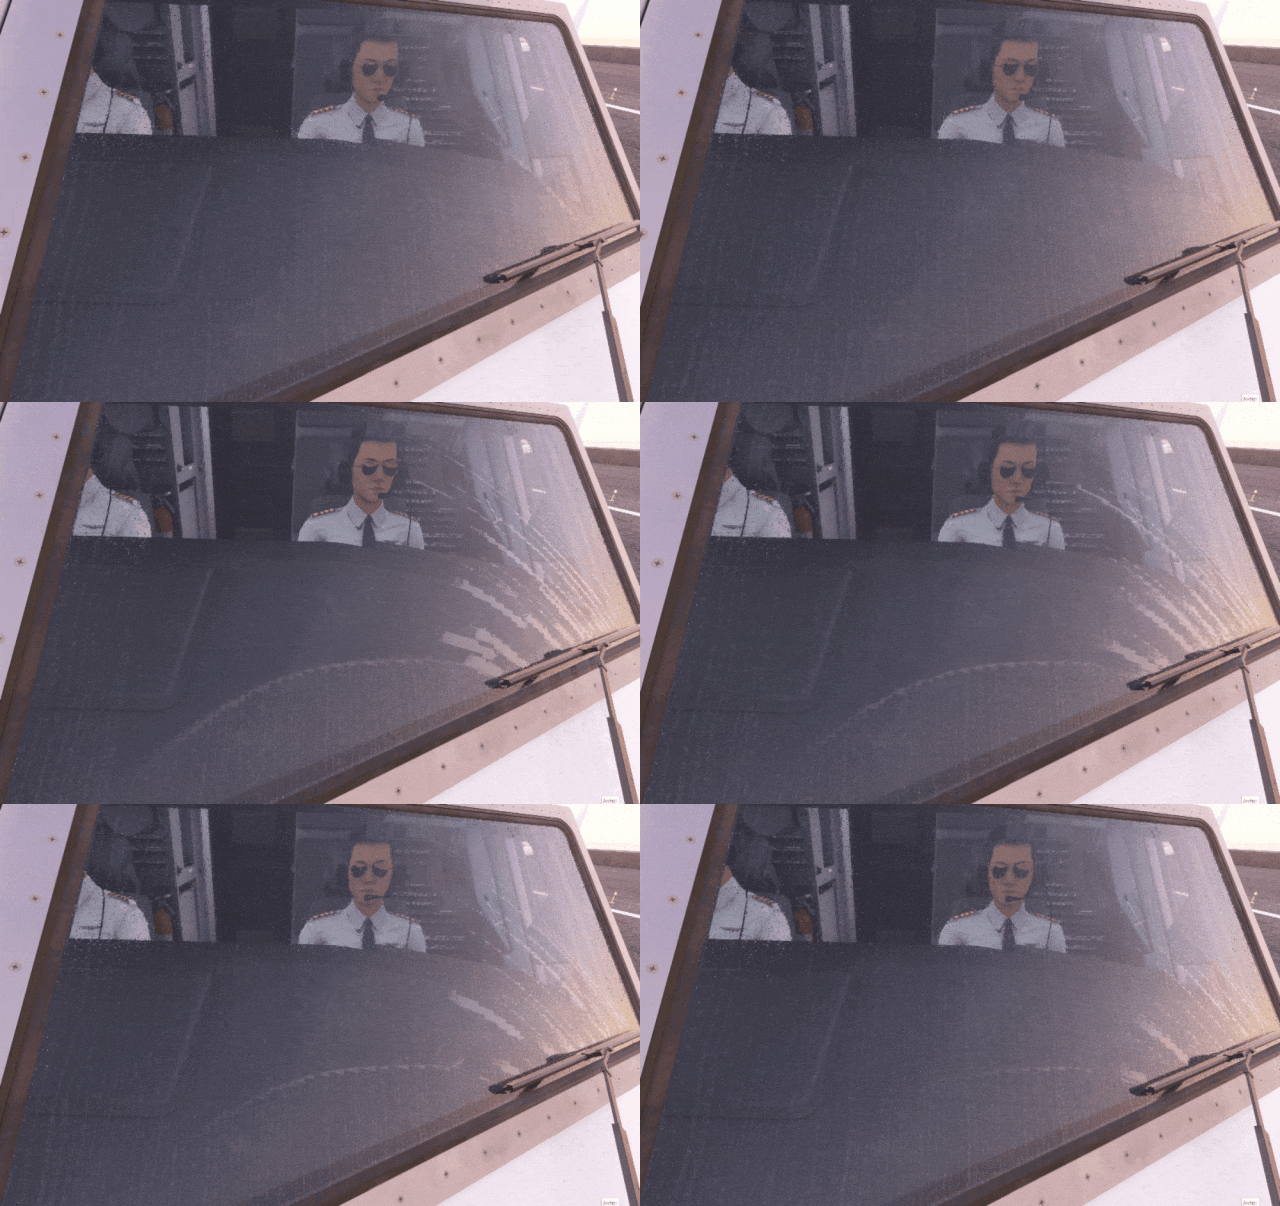
Insect Splatter
One of the window effects available to you is that of having realistic window impacts from insects over time when flying. This effect is simple to set up and only requires two textures, however you must use the supplied textures for this effect, which you can get from the Shared Assets texture folder. The exact paths are as follows:
<SDK Root>\SharedAssets\texture\Dirts\Insects_Helico_Windshield_albd.png
<SDK Root>\SharedAssets\texture\Dirts\Insects_Helico_Windshield_mask.png
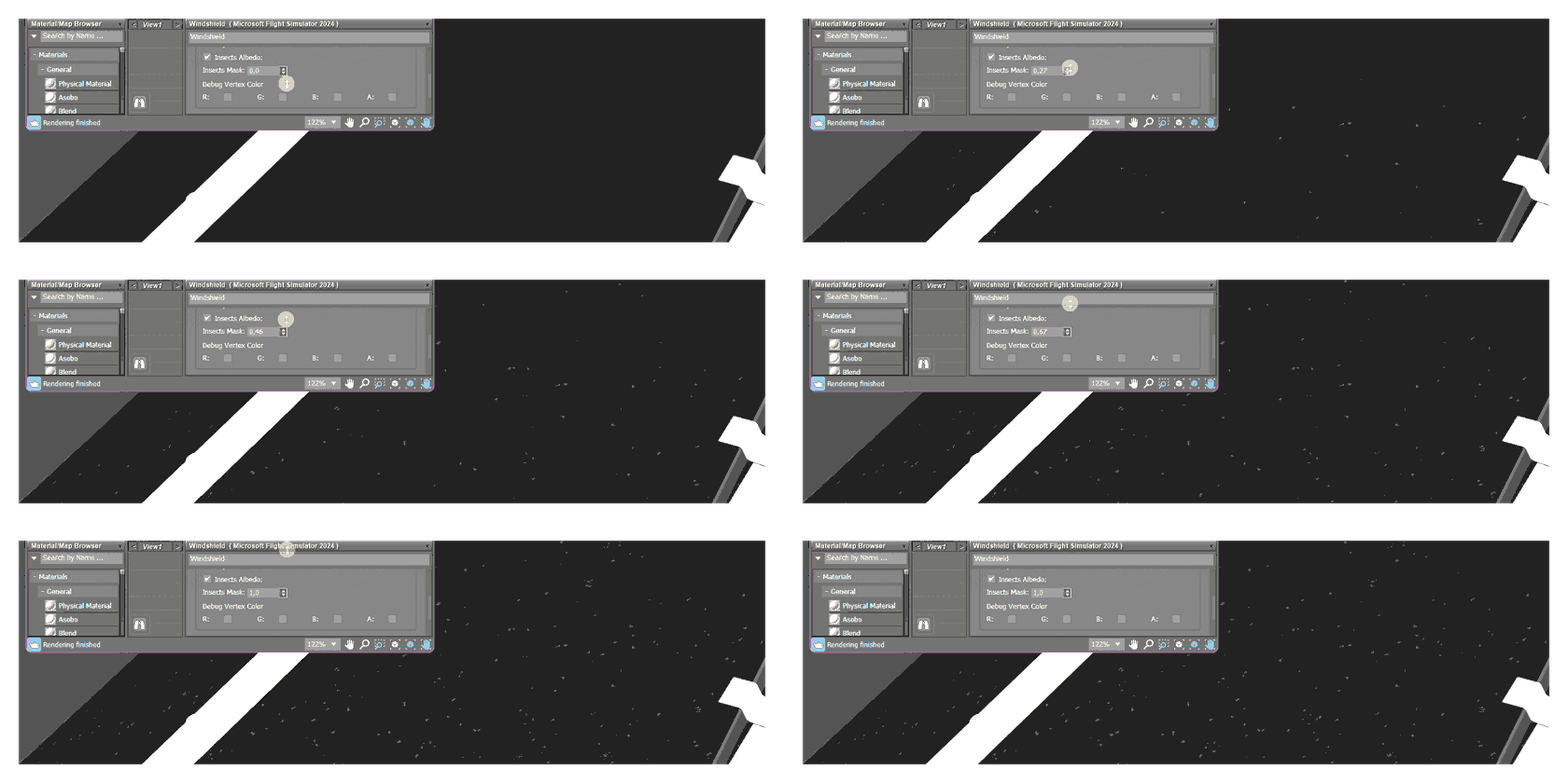
These go in the Insects Albedo (RGBA) texture slot and the Insects Mask (A) texture slot, and must be applied to the UV2. There are no additional parameters related to this effect, as it is all handled by the simulation, however you can debug the effect using the Windshield Parameters (Debug Shader Windshield) section:
NOTE: The image below has had the brightness augmented to better show the effect.
Having added this component to the windshield material, the Model Behaviors XML file will need to call the ASOBO_ET_COMMON_Dirt_Multiple_Template and include, as parameter tags, each of the window node names which use the windshield material, for example:
<Component ID="Dirt">
    <Component ID="Regular_Dirt">
        <UseTemplate Name="ASOBO_ET_COMMON_Dirt_Multiple_Template">
            <TYPE>REGULAR</TYPE>
            <SaveParameters ID="Dirt_NODE_IDs">
                <Windshield_FL/>  <!-- Front left windshield node -->
                <Windshield_F/>   <!-- Front center windshield node -->
                <Windshield_FR/>  <!-- Front right windshield node -->
            </SaveParameters>
        </UseTemplate>
    </Component>
</Component>
Additional Details
There are a number of additional details that can be added to the windshield, all of which require a texture to be setup correctly, and some of them also have the possibility of being tweaked using specific vertex colours and parameters. These are all very straightforward to use and the instructions are given in the following sections related to the textures they use: