DEVELOPER MODE
When you enable Developer Mode in Microsoft Flight Simulator 2024, it will enable a number of extra tools that you can use within the simulator to not only load in custom content, but to create your own content that can then be packaged as an add-on. Most of the tools can be used to create custom content without ever touching the files that are created "behind the scenes", but you may be required to have created the assets required for this content using external tools (for example, 3DS Max to create models or animations). You can find more information about creating assets from the following pages:
After enabling Developer Mode, there will be a new menu bar across the top of the Microsoft Flight Simulator 2024 window:

Each of these menus is explained in the following sections:
The most important part of Developer Mode is the different Editors that you can access through the Editors menu. You can get information on these editors from the links below:
- The Project Editor
- The Biomes Editor
- The Camera Editor
- The Material Editor
- The Procedural Assets Editor
- The Scenery Editor
- The SimAttachment Editor
- The SimObject Editor
- The Visual Effects Editor
Developer Mode Window Control
When working in Developer Mode, there will be many times when you have multiple windows open and active, and you'll want to organise things to suit your needs and specific workflow. To help with that, the Developer Mode windows are fully customisable and can be "snapped" to certain parts of the screen, or even pulled outside of the Microsoft Flight Simulator 2024 window as separate entities (ideal if you have two monitors, for example).
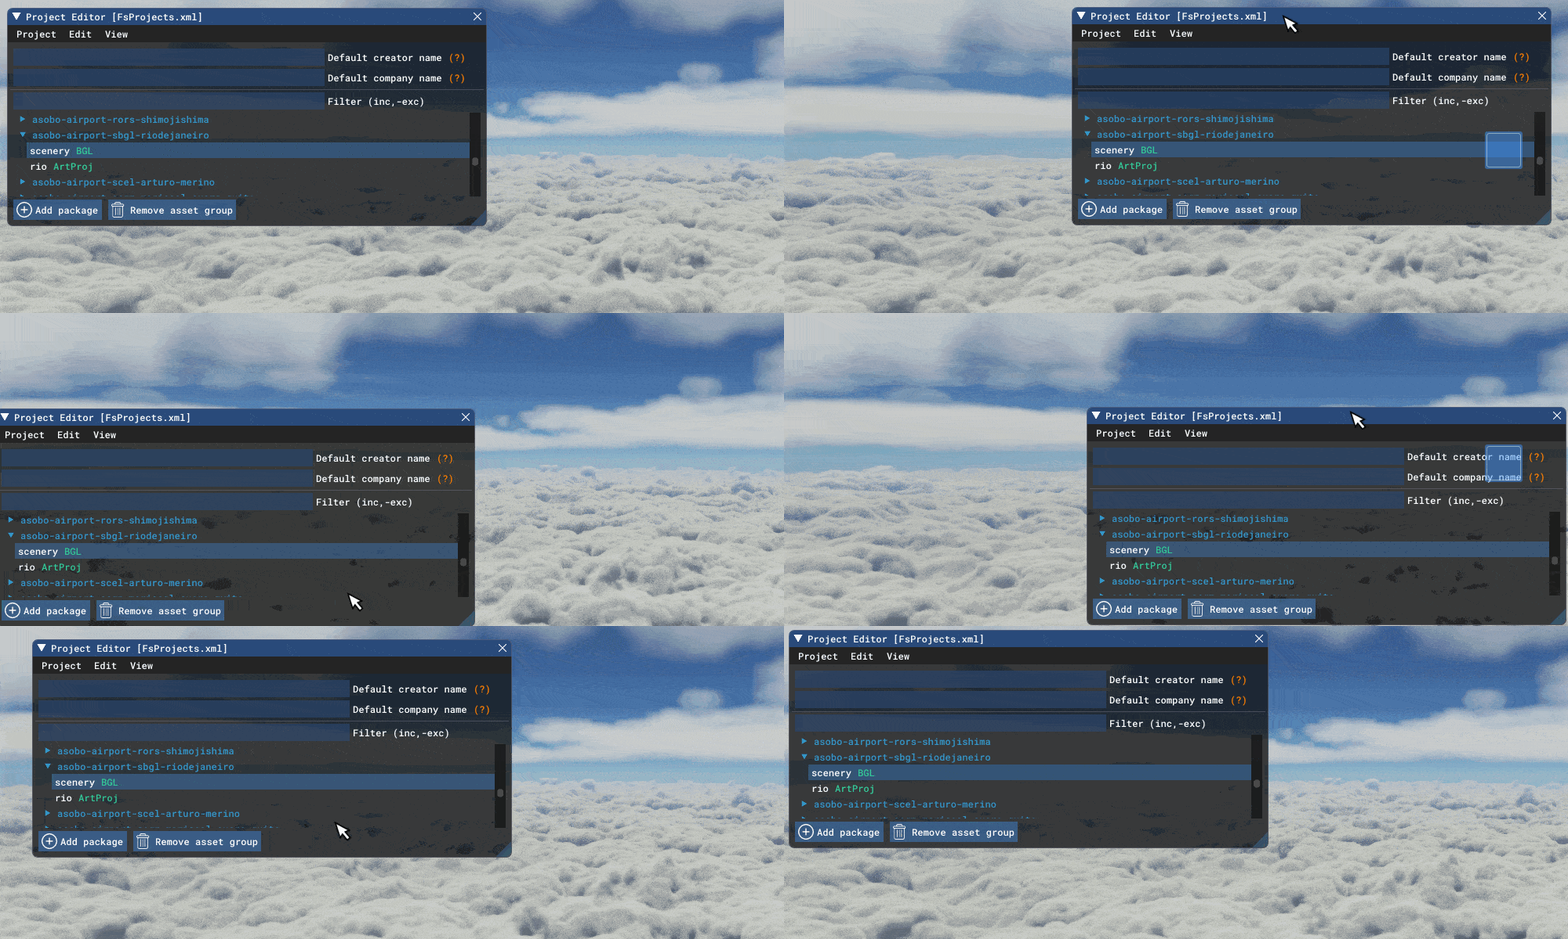
To start with, you can move any of the windows around (including pulling them out of the sim window to another monitor) by simply clicking on them and dragging - the image below shows dragging using the top bar and also clicking anywhere and dragging, and both methods will move the window along with the mouse:
The top bar can also be used to minimise and restore windows, so that you can hide them from view without actually closing them. This is achieved by clicking on the arrow beside the window name, which will toggle between minimised and restored states, or by simply double clicking the top bar to switch states (note that not all windows have this toggle):

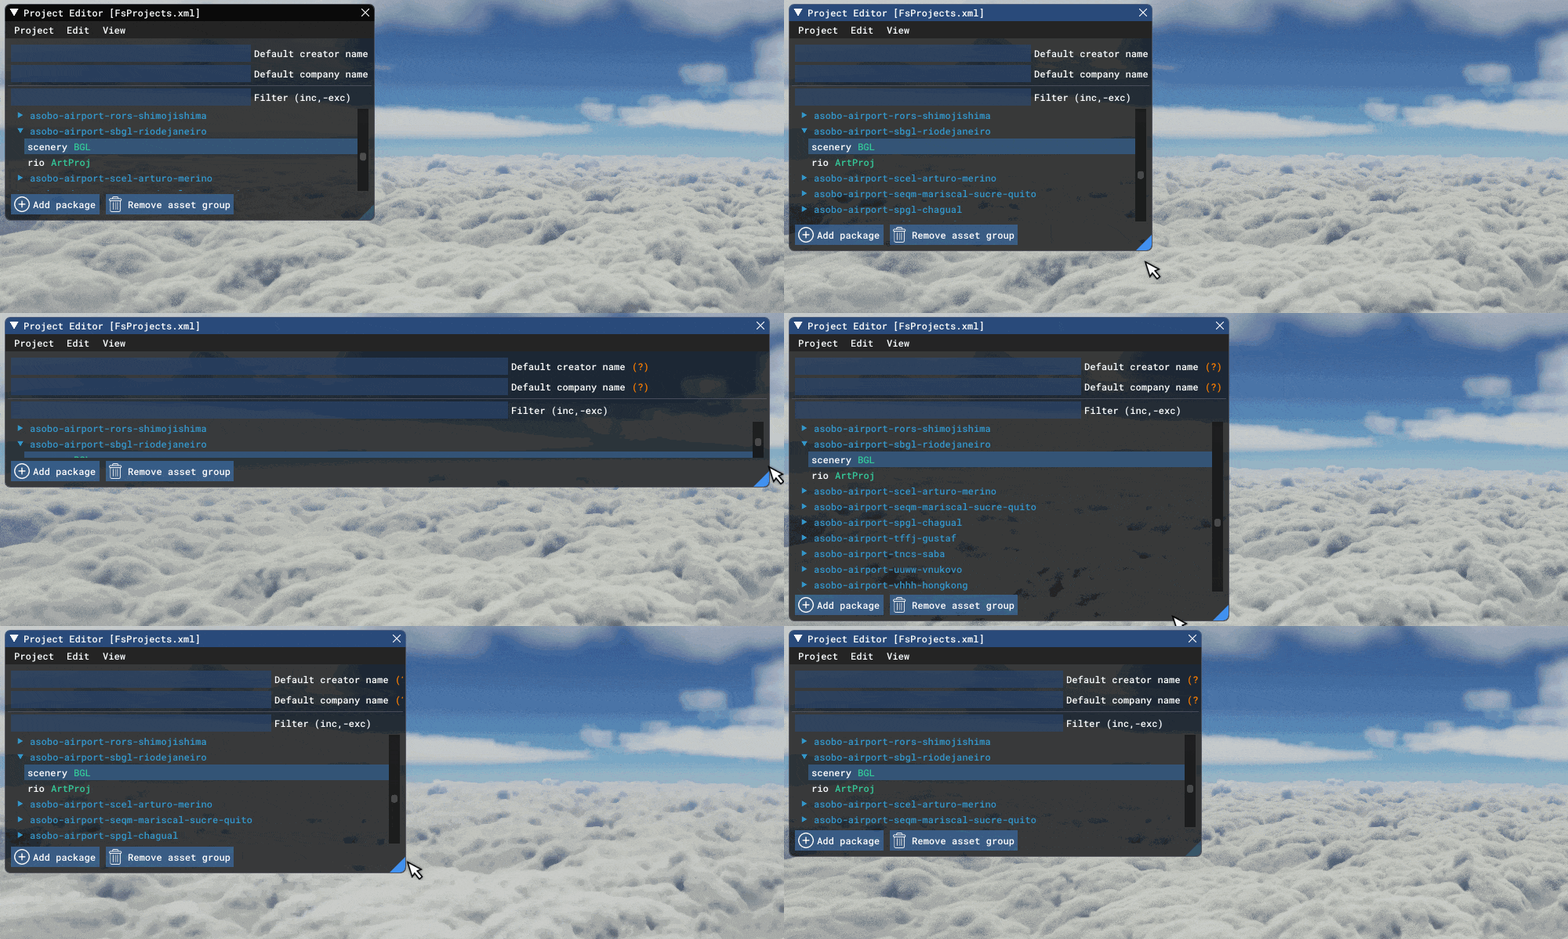
You can also resize any window by going to the lower-left corner and clicking and dragging:
Another useful tool is the ability to "snap" windows to specific areas of the screen. This is done by dragging the window to one of the "snapable anchors" that are show in the image below:
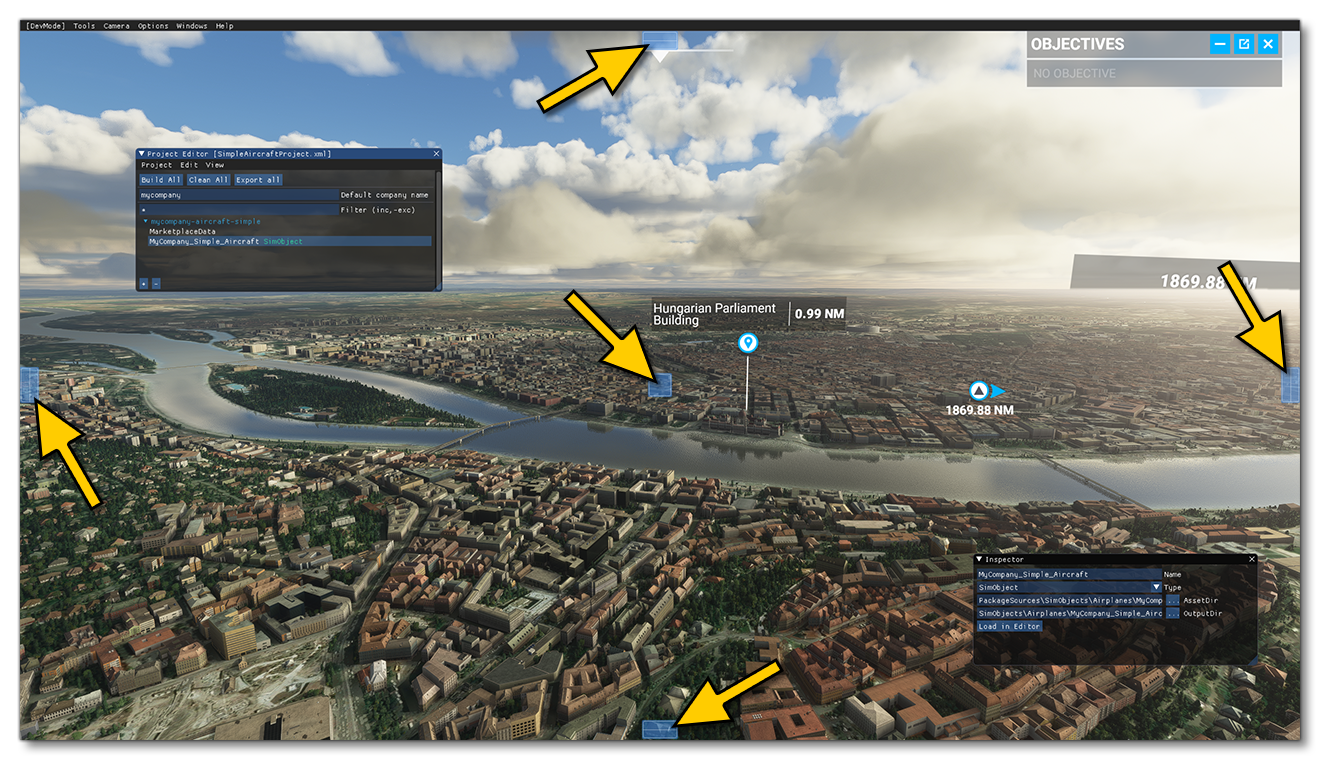
When pulled onto one of the anchor points, the window will expand to fit the sim window. For example, using the snap anchor on the left will expand the window vertically to fill the height of the sim window, or using the middle snap anchor will make the window fullscreen. You can also use these "snapable anchors" within individual windows to create split windows that contain two or more editors:
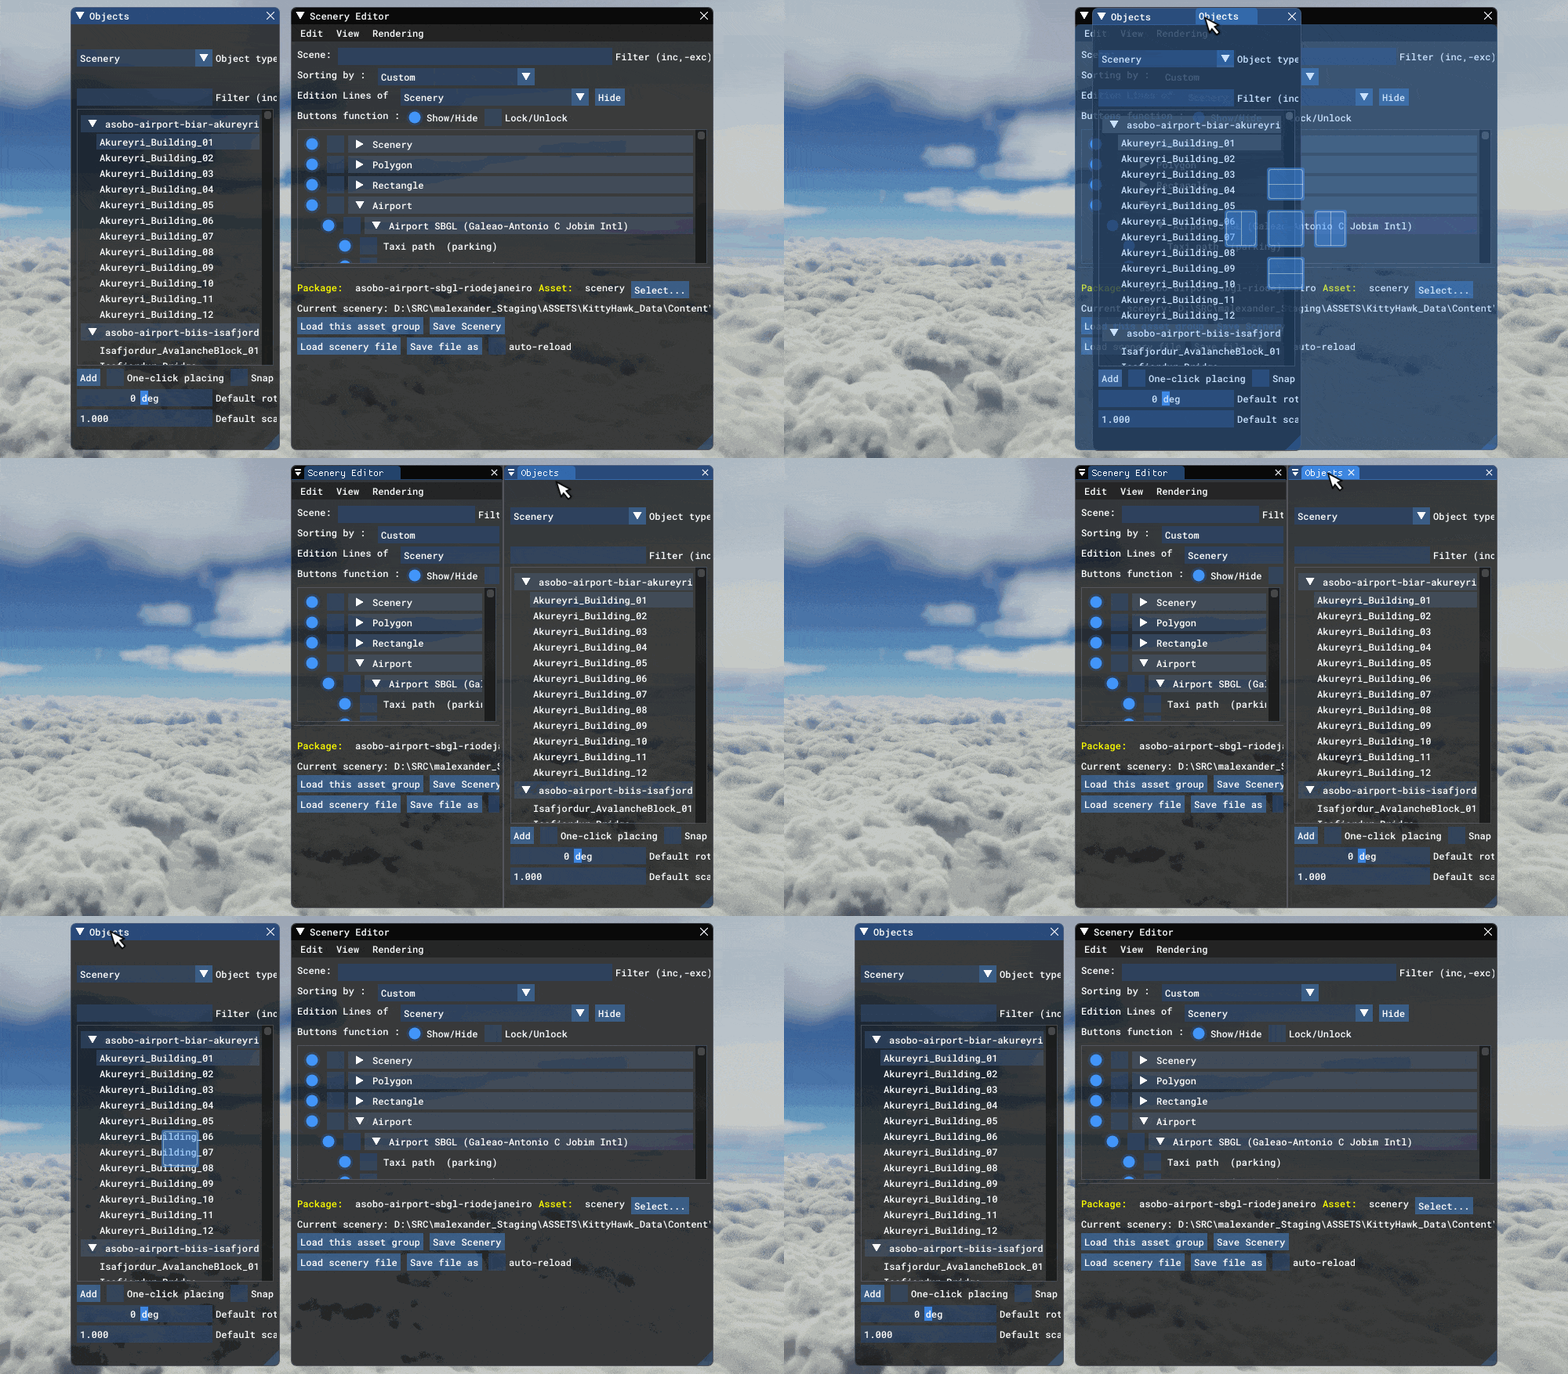
To un-snap the window again, simply click on the top bar and then drag (also shown in the image above).
Next, you can group windows so that they form a single window with tabs for each of the editors in the group. This is done by dragging one window onto another, either dropping on the central snap node, or dropping on the top of the target window, as shown in the following image:
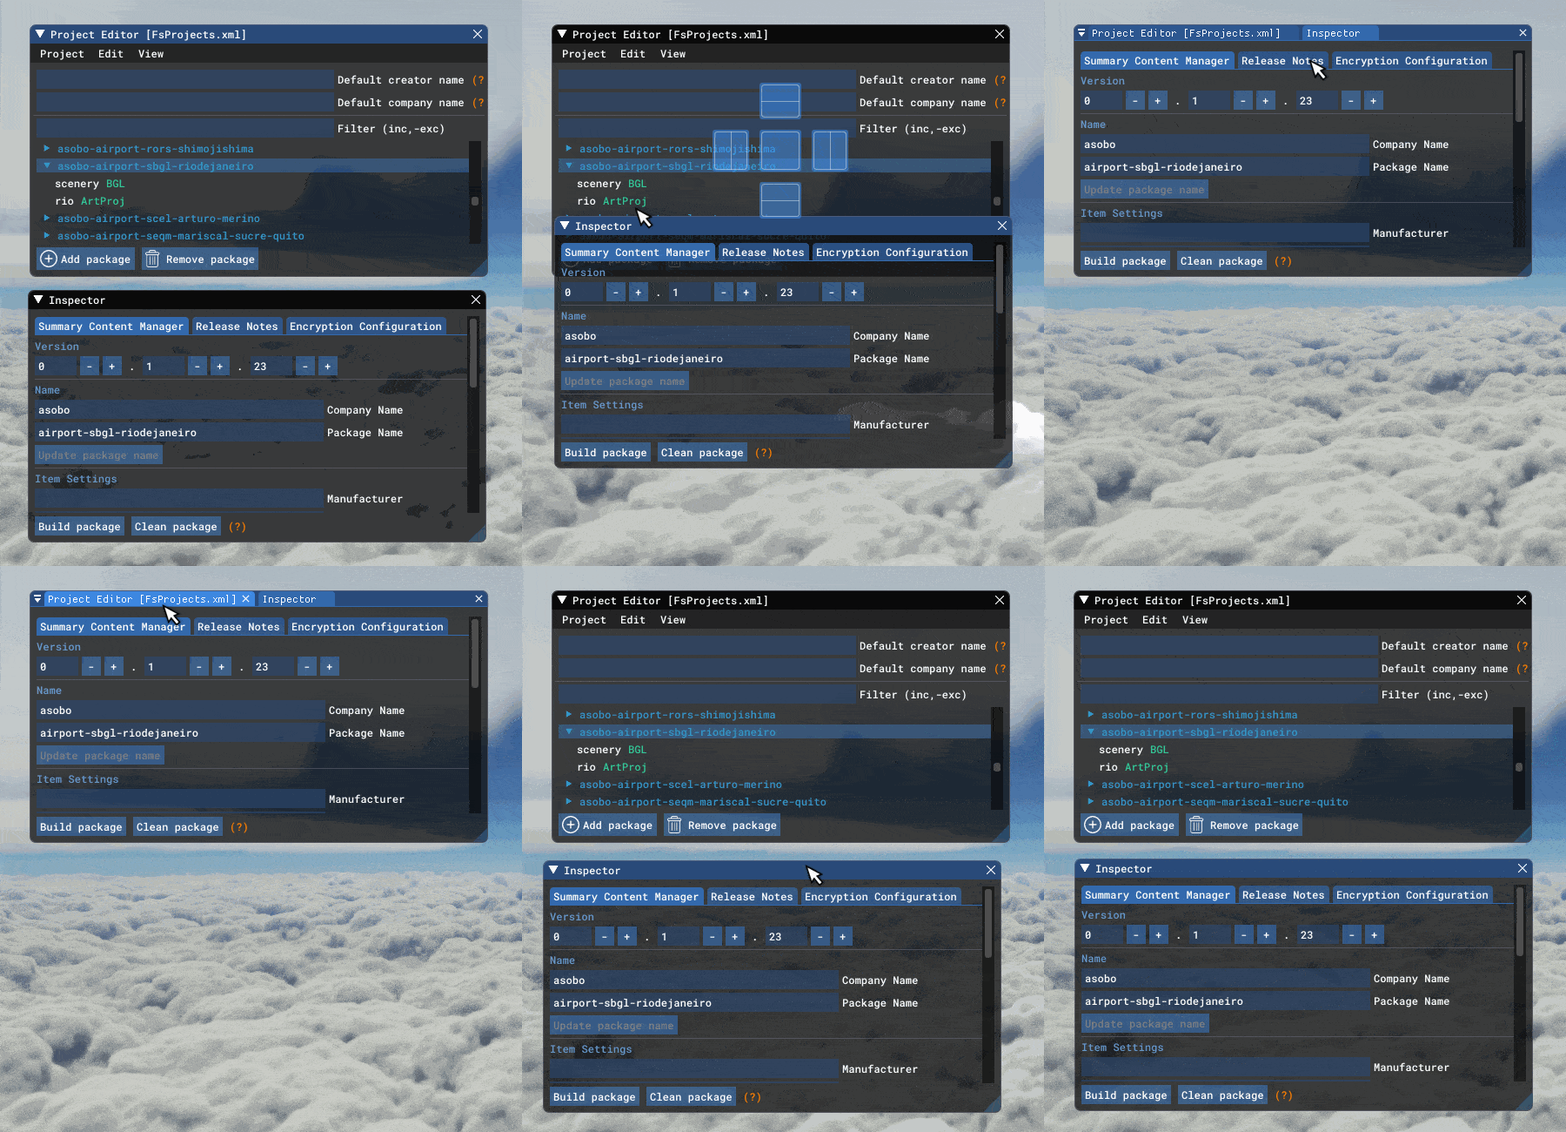
To un-group, simply click on the tab and then drag it off the main window to create the individual window again.
Finally, you have the ability to open a Quick Menu using the Ctrl + Space keys:

This window lists all the currently open DevMode windows, and you can cycle through them maintaining Ctrl pressed and repeatedly pressing the Space key. Releasing Ctrl will close the window and take you instantly to the option that was last highlighted.
Detachable Menus
Some Developer Mode menus have an option at the top labelled Detach Menu:
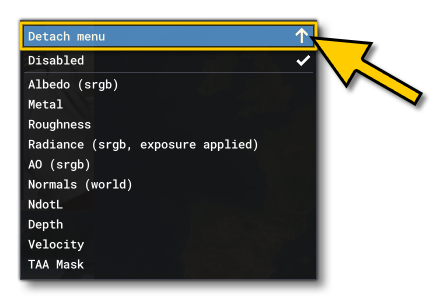
This option will convert the window into a stand-alone window that can be positioned and docked anywhere on the screen:
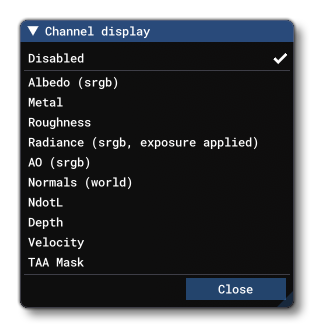
This option is not present on all sub-menus, and is provided for those menus that can be used to toggle settings on/off or to open/close sub-windows, mainly for debugging. When you are finished with these windows you can click on the Close button to remove them the screen.