USING THE SCENERY EDITOR
This page illustrates how to use the Scenery Editor. For a more general overview of the editor fucntions please see the following page:
For information about the available objects that can be placed in a scene please see here:
Getting Started
In this section we'll outline the general workflow for creating a new scenery package from scratch. Note that the procedure here is not meant to be used if you are creating airports, for that you should see the page Creating Or Replacing An Airport. Also note that if you are wanting to download and edit an airport from the World Hub, then you should follow the procedure outlined on the Setting Up World Hub page.
IMPORTANT! When creating scenery, the user aircraft must be located near or within the zone being edited otherwise you may find that placed assets won't be displayed.
- To start with, you'll need to open the Project Editor from the DevMode Tools menu.
- In the Project Editor, select New Project from the Project menu.
- Give the project an appropriate name and a location to save it to:
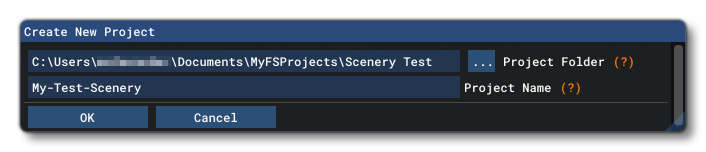
- Click the
OKbutton to open the Package Creation wizard where you will be asked to choose a package type to add:
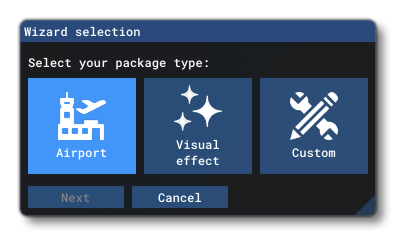 In this case you want to click on the
 Custombutton. - The package wizard will expand to present you with options to give the package a Name, a Content-Type, and the Display Name (this is what will be displayed in the content manager and also on ther Marketplace if the package is published). The important thing to note here is that the content-type should be SCENERY:
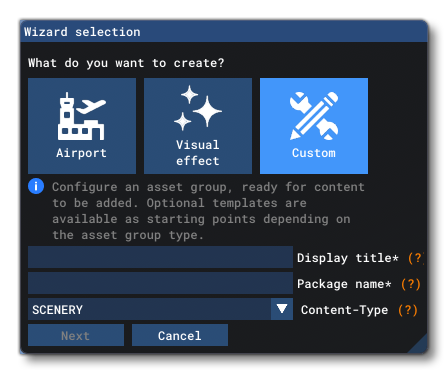
- When you click the
Nextbutton, you will be shown a new window asking you define an asset group. All packages need at least one type of asset to store the required data for the add-on, and in this case it's going to be the BGL asset type:
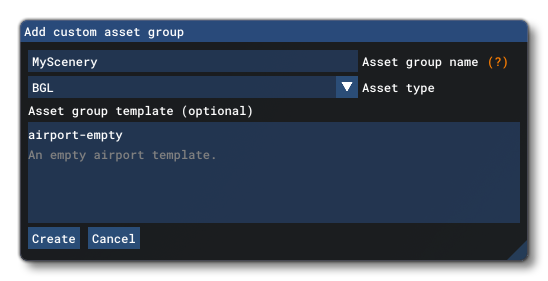
Note that you should not select the airport-empty template! That would only be used for creating an airport package, which we're not doing, we're making a generic scenery package. - Click the
Createbutton - In the Project Editor, click on the new package you've just created you'll see in the Inspector window that it's all been set up correctly, and you may edit any of the values here if required:
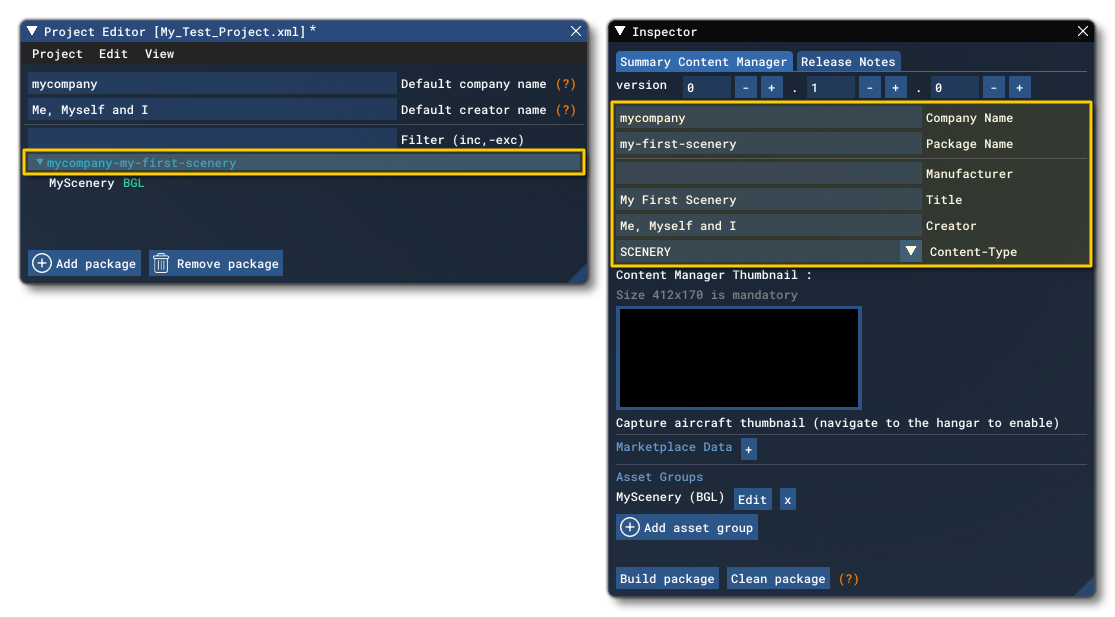
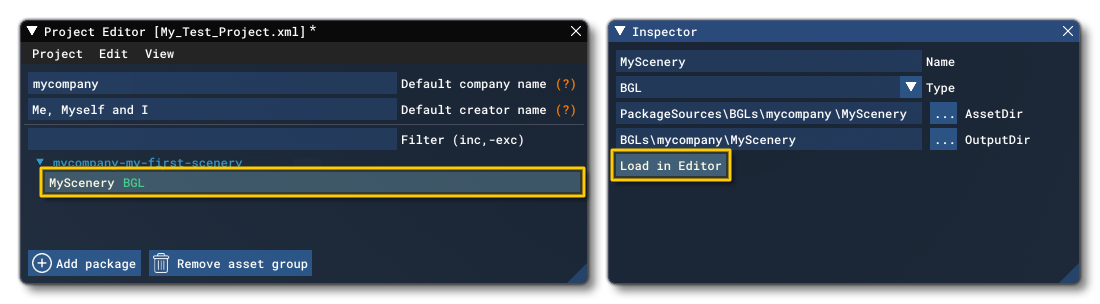
- Next, you want to select the asset group that you added to the package. This will change the contents of the Inspector window to show the Asset Directory and the Output Directory. The asset directory is where the base project files will be stored and is relative to the main project XML. The output directory is the directory within the "Package" directory where the package will compile the asset groups. Once you have checked that these paths are correct (they should have been auto-created for you, but you may want to change them, although it's not recommended), you can click the
Load In Editorbutton:
- The scenery editor will open and you can begin adding elements, however we recommend that you first save the project before continuing (from the Project Editor Project menu).
NOTE: At this point you would probably want to navigate to the place in the world where you want to add the new scenery, which can be done using the Teleport Window from the Tools DevMode menu.
If you are loading a previously created add-on package, then you would simply select Open from the Project Editor menu to open the package, then select the BGL asset group that you want to edit and select the Load In Editor option from the inspector.
NOTE: When loading a previously created package, you can double-click on any of the elements in the scenery editor content list and be transported to the location of the element.
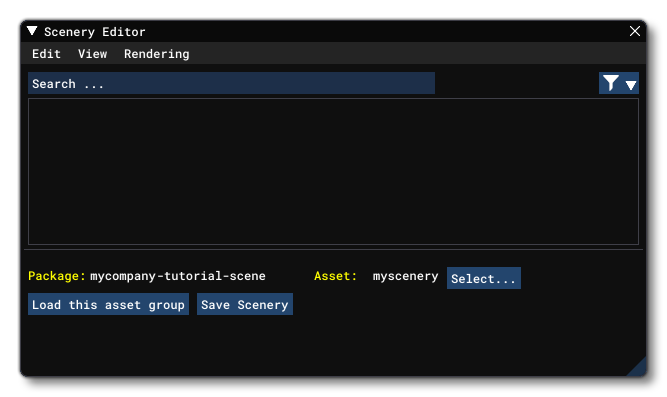
When you have loaded the BGL, the camera will switch to the Developer Camera and the Scenery Editor will open, presenting you with the following window:
If the camera does not switch automatically to the developer camera you can enable it manually from the Camera menu. The Developer Camera is moved around the world using the mouse and keyboard controls listed below:
- To rotate: hold the
Altkey, left click and drag the mouse. - To move: hold the
Altkey, middle click and drag the mouse. - To zoom in/out: use the mouse wheel or hold the
Altkey, right click and drag the mouse.
You can find a full list of the controls available from the Camera Controls page.
Adding An Element To The Scene
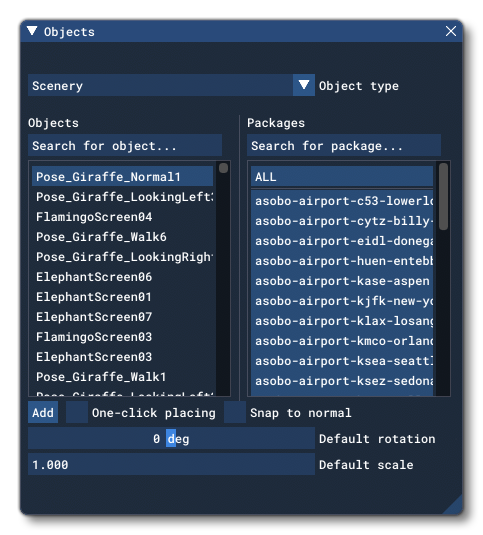
To add anything to a scene you will need to use the Objects window. This is opened from The View Menu in the Scenery Editor, although it may open automatically when you load a package into the editor:
To add an item from this window to a scene, you would do the following:
- Select the type of object to add from the Object Type menu at the top.
- Select one of the objects of the given type from the Objects list, on the left. Note that the list will show objects for the packages that are installed, when appropriate (not all objects are associated with packages). These packages are shown on the right, and you can click on any package - or use
CTRLand/orSHIFTand click to select multiple packages - to see only the objects associated with the selected package(s). - Click the
Addbutton to add it to the scene.
As an example, let's add a Windmill somewhere in the world. For this, simply navigate to an area using the Developer Camera then in the Objects window select the Object Type SimObject. Then type "windmill" into the filter to find and select the Windmill object, then click Add:
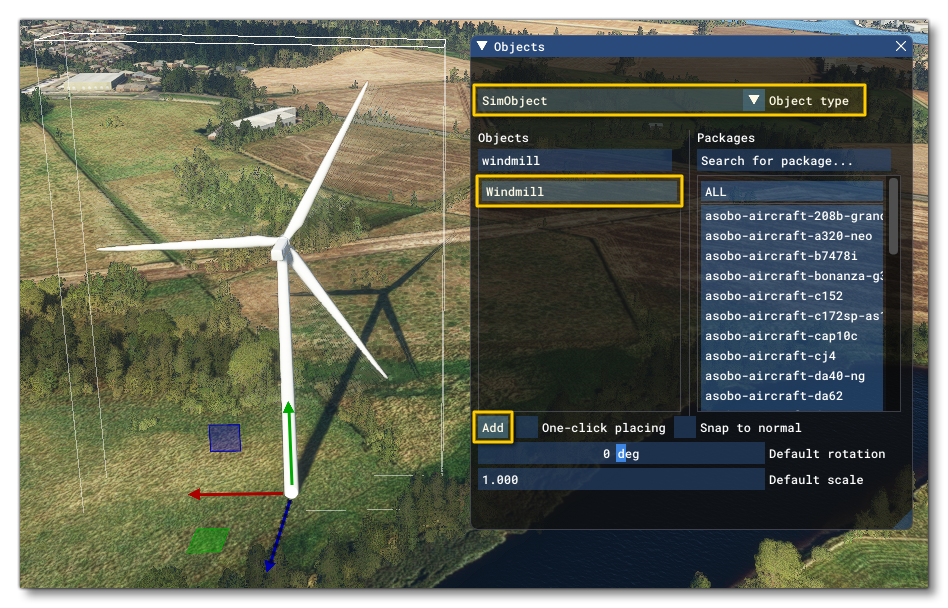
The Windmill object will be added to the scene and will also now be listed in the scenery editor:
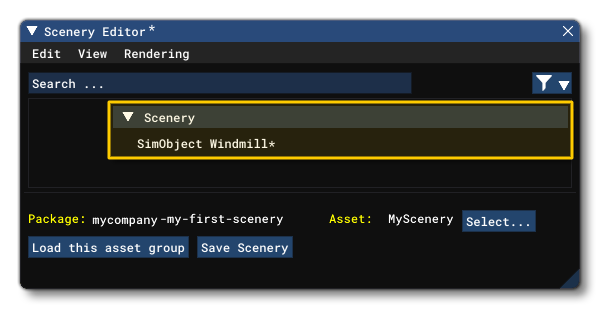
Notice that the object is listed with a star beside it (*), indicating that it hasn't been saved as part of the package yet. To resolve this you can click the Save Scenery button at any time, and it's recommended that you do this regularly to prevent any data loss in case of issues or mistakes! Clicking this will open a file window where you can save the file. You'll want to save the file in the same scenery folder you created for the Asset Directory, as explained further up on this page (under the root directory for the package), eg:
 You can name the scenery file anything you want, but in general it would be something like "scene" or "scenery". The "Current Scenery" path in the Scenery Editor will update to show the saved file path:

NOTE: After the initial save you can use the keyboard shortcut of Ctrl + "S" to do a quick save of the current scene in the same file.
ModelLibs
You may also use the ModelLib asset group in a scenery project to add custom models that can then be used in the scene. It is important to note that when doing this, the package should be built using the Build Package button in the Inspector before any objects that it creates can be used in the Scenery Editor. This should be done before opening the Scenery Editor otherwise the new objects may not be available and you will have to close and re-open the Scenery Editor to access the new objects. Also note that if the contents of the ModelLib package sources change (ie: you add a new set of source files to the asset group), you will also need to close the Scenery Editor, rebuild the package, and then open the editor again to have access to those objects.
Positioning Scenery Elements
Once the object has been initially added you can then fine-tune its position, size and rotation using the different gizmos that are available. You can open the gizmos window from The View Menu in the Scenery Editor:
- Translate: This permits you to move the object on the X/Y/Z axis.
- Rotate: This gizmo lets you rotate the axis around the X/Y/Z axis.
- Scale: This permits you to scale the object on the X/Y axis.
You can also fine-tune the position more precisely using the input fields in the Gizmo window. For more information on this, please see the Gizmo section of The View Menu page.
Finally, the Objects window also has an option at the bottom for One-click placing:
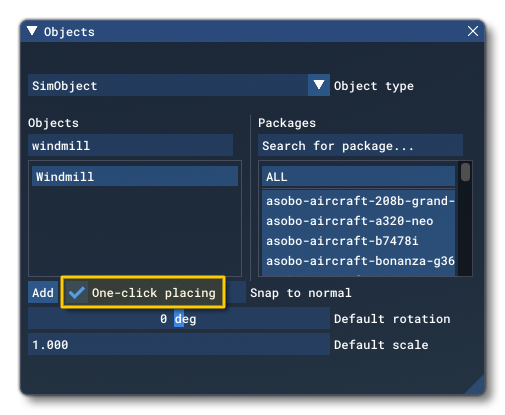
When enabled, this mode allows you to place the same object several times on the ground at the mouse position by left-clicking the mouse. If you click and hold the mouse, you can then hold down the the Ctrl key and move the mouse to change the rotation and/or hold the Shift key to change the scale.
Selecting Elements
Once an element has been placed in the simulation there are multiple ways it can be selected again to be edited. The most basic of these is to simply click on it with the left-mouse button in the world, which will select it automatically. If there are multiple overlapping objects, then repeatedly clicking the same position will cycle through them so you can select the one you want:
When you want to select multiple elements in a scene, you can hold down Shift, then click the left mouse button and drag to create a window around the elements. When you release the mouse button, there will be a single Gizmo in the middle of the selection and any changes made using the gizmo (or in the gizmo window) will affect all of the selected elements. To select multiple individual elements, you can hold down Ctrl and then click the elements you want within the simulation, and they can then be moved/scaled/rotated as if they were a single element too.
Finally, you can select a single element from the , which will select it in the simulation for editing, and you can double-click the element to move the developer camera to it. You can also use Ctrl + Click to select multiple individual elements, or click an element then Shift + Click to select consecutive elements in this list.
Properties
Every object element - and group element - that you add to a scene has its own specific properties and it's important that you are aware of them, since many objects will require you to add information to the object properties for them to be valid. To open the properties window for any object or group element either use The View Menu option for Properties, or right click on the object in the Scenery Editor window and check the Properties box. For objects, a window similar to the following window will open (the exact contents will depend on the object):
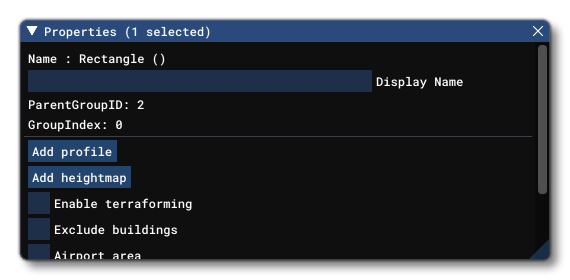
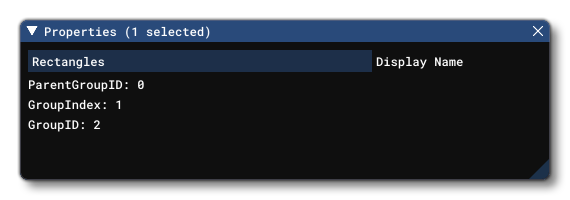
Note that the exact contents of this window will change depending on the type of object element that is currently selected. The properties for each of the different objects are explained from the Objects page. For a selected group, the following will be displayed (see Scenery Groups for more information):
Keyboard Shortcuts
There are a number of keyboard shortcuts that can be used when working with the Scenery Editor, which we've listed below for your convenience:
Ctrl+G: Create a new group.Ctrl+Shift+G: Ungroup. Note that this removes items from the group but doesn't delete the group.Arrow UpandArrow Down: Move an object up/down in the hierarchy group hierarchy.Ctrl+R: Rename the selected object.Ctrl+H: Hide the selected objects.Ctrl+Shift+H: Hide the edition lines of the selected objects.Ctrl+L: Lock the selected object.Ctrl+F: Focus the camera on the first selected object.Shift+A: Add an Apron Object.Shift+L: Add a PaintedLine Object.Shift+M: Add a TaxiwayParking Object.Shift+P: Add a TaxiwayPoint Object.Shift+R: Add a Runway Object.Alt+H: Hide all objects.Alt+Shift+H: Hide all the edition lines.F2: Show/Hide the "Hide-Lock by type" sub-window.